Pages

Friday, January 29, 2016

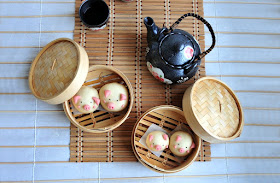
Piggy Chinese Steamed Buns (ManTou) 小猪猪饅頭 – Made with All Natural Food Coloring


Did you have a chance to check out my recent post "How to Make the All Natural and Organic Red Food Coloring"?  If not, click here for a quick recap.  Otherwise, let's talk about these super adorable Piggy Chinese Steamed Buns.  Let's start by watching the YouTube video tutorial above for a step-by-step instructions on how to make these piggies, from start to finish.  By the way, I always post the complete written recipe at the end of each post for your reference.

Check out how to make these adorable Piggy Chinese Steam Bun 小猪猪饅頭 with step by step video tutorial!

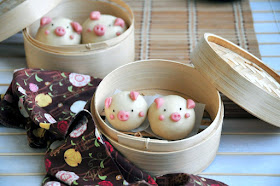
These little piggies are inspired by the Hello Kitty Dim Sum we had when we visited Hong Kong last summer.  This cute character simply makes any food a lot more fun to eat and enjoy.  We have had our fair share of the plain Chinese Stem Buns (Mantou or 饅頭 in Chinese) in the past.  They are soft and slightly dense buns with a hint of sweetness.  People usually eat them as is or with savory dishes, similar to dinner rolls in American cuisine.  Or, you can dip them in sweetened condensed milk as a light dessert.  Either way, they are just as good and very versatile.


Check out how to make these adorable Piggy Chinese Steam Bun 小猪猪饅頭 with step by step video tutorial!


Don’t you love these super adorable little piggies?  They are almost too cute to eat, almost!  My kids love them so much, especially my little girl.  I can’t wait to create some other characters for them to enjoy.  And I think I’ll add some fillings to these buns next time.  Chinese BBQ pork would be a great option for savory, and red bean paste or custard would be nice options as sweet versions.


Check out how to make these adorable Piggy Chinese Steam Bun 小猪猪饅頭 with step by step video tutorial!


I hope you enjoy today’s recipe and video tutorial.  Don’t forget to subscribe to my YouTube channel here.  You’ll be the first to know when I have new video tutorials published.   Stay tuned for more fun and scrumptious recipes in the near future.

Monday, January 25, 2016

How to Make All Natural And Organic Red Food Coloring


Last summer, my family visited Hong Kong and China for a vacation.  During our stay, my Kids fell in love with Chinese Steamed Buns (Mantou or 饅頭 in Chinese.)   These steamed buns are soft and slightly sweet.  They are a wonderful side dish to enjoy with a meal (kind of like the idea of dinner rolls in the American cuisine).


It was also during our visit to Asia, we had a chance to visit the Hello Kitty Dim Sum restaurant (click here to read more).   That visit gave me an idea to turn the ordinary plain white steamed buns into something more adorable!  And these Piggy Chinese Steamed Buns were born.  These Piggies are special!  And I'm about to share with you a secret ingredient that I used to tint their ears, snouts and cheeks.  The ingredient is organic beet roots!  


Please check out my video tutorial above on how to make this wonderful red food coloring.  The color came out so beautiful and vibrant.  Best of all, the flavor is light and neutral so it won’t affect the taste of the food that you’re coloring with.  Plus, a little goes a long way!  You can use this natural food coloring to tint your pastry, bread dough, noodle, icing, cookies, and etc.  Anything that calls for liquid food coloring, basically.   I hope you enjoy today’s recipe and tutorial.  Stay tuned on the recipe in a few days on how to make these Piggy Chinese Steamed Buns!


Monday, January 18, 2016

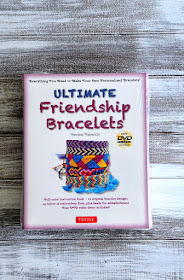
The Ultimate Friendship Bracelets Kit Review and Giveaway


The Ultimate Friendship Bracelets Review and Giveaway


Some of my favorite gifts that I’ve received over the years are handmade.  It shows that someone cares and spend the time to make you something from scratch.  That really warms my heart.  Over the holiday, I had a chance to review a copy of the Ultimate Friendship Bracelets Kit
My Little Girl and I spent some quality time together, we watched the video tutorials provided in this kit and we made some gorgeous bracelets for her friends. 
“Friendship bracelets never go out of style. And with this fun friendship bracelet kit, they're easier and more fun than ever!”
 
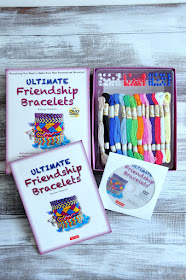
Ultimate Friendship Bracelets Kit gives you everything you need to make 12 classic bracelets including:
  • 14 colorful skeins of embroidery floss
  • a full-color book of easy-to-follow diagrams and instructions
  • a DVD of video demos showing how the patterns emerge and how to finish off a bracelet in style
  • some beads thrown in for fun and experimentation

This kit features all the classics, from 2-color chevrons, stripes and diamonds to funky 6-color totems, plus a heart pattern, a tasseled a zigzag, and more. And there are some great ideas for embellishing your bracelets to make them even more personal.

There's still nothing more meaningful to give someone special than a friendship bracelet, made by you. So grab this kit and have fun making that little gift that says "from me, to you—with love."


The Ultimate Friendship Bracelets Review and Giveaway


You can order your own copy of the Ultimate Friendship Bracelets Kit here.   Or, try your luck to win one because I’m giving  away a copy of the Ultimate Friendship Bracelets Kit to one lucky uTry.it reader, courtesy of Tuttle Publishing.

Here are the details on how to enter.

One lucky uTry.it reader (open to my worldwide readers) will win a copy of “the Ultimate Friendship Bracelets Kit”.


To enter, simply leave a comment on this post and tell me if you have made friendship bracelets in the past.  Or, that you want to win and start making some.  Please also leave your email address along with your comment so that I can contact you if you're the lucky winner!  Deadline to enter is , February 14th, 2016 by mid-night PST.  Winner will be selected through Random.org and announce shortly after the giveaway is closed.

For extra entries, do any or all of the following (leave a separate comment for each extra entry):
1)  Subscribe to my YouTube Channel, click here.
2)  Follow me on Instagram, click here.
3) "Like" uTry.it's Facebook Page, click here.
4) Pin a picture from this post onto Pinterest.
5) Share this giveaway on Facebook (with a link back to this post please)
6) Share this giveaway on Twitter (with a link back to this post please)
That’s all and Good Luck everyone!


Disclaimer:  I received a copy of “the Ultimate Friendship Bracelets Kit” for the purpose of this review and I was not compensated in any way to write this post.  All comments and opinions are 100% my own.

Thursday, January 14, 2016

Strawberry Sweetheart Meringue Dessert Cups


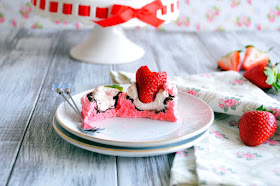
Ready for Valentine’s Day?  Oh, don’t panic, the V-day is exactly a month from now.  But I guess being prepared is always better than rushing at the last minute, right?  That’s especially true if you’re trying something new, such as making this gorgeous and fun dessert to share with your Valentine!  Let me present to you: Strawberry Sweetheart Meringue Dessert Cups!


These gorgeous dessert cups are easier to prepare than they look.  AND, they are gorgeous?   I think strawberries and dark chocolate go hand in hand, when it comes to the ultimate dessert.  Together, I also think they are perfect ingredients for Valentine’s Day!


At the base of this Sweetheart Dessert Cup is a strawberry meringue cup, which is crispy and light.  Yet, it is slightly sweet and tart at the same time.  I covered the inside of the meringue cup with a thin layer of dark chocolate.  The dark chocolate adds a nice bitter sweet flavor while preventing moisture (from the cream) from getting into the meringue.  This way, the meringue cup stays nice and crispy.


I filled the cups with a strawberry cream, which consists of strawberry preserves for the aroma, whipping cream for the light texture, and some mascarpone cheese (Italian sweet cheese, comparable to American cream cheese) for a smooth and silky richness.   Last but not least, I garnish these cups with a strawberry in sweetheart shape and a spring of mint (please see the Youtube video above on how to easily cut the strawberries into heart shapes).  These components are similar to a pavlova, but in a dessert cup form. 


These Strawberry Sweetheart Meringue Dessert Cups will surely win your Valentine’s heart!  In my humble opinion, preparing a treat for someone is a wonderful way to show your love, don’t you agree?  I wish you all a wonderful Valentine’s Day celebration in advance.  If you don’t have a Valentine yet, you can still make this treat for your family, friends or someone you care about.   Wish you all a sweet and warm V-day.


Tools and ingredients used:

Wilton #22 Piping tip (Click here for more information)
Pastry Bag (Click here for more information)
Silpat Baking Mat (Click here for more information)
Stand Mixer (Click here for more information)
Baking Pans (Click here for more information)
Cooling Rack (Click here for more information)
Vanilla Powder (Click here for more information)
Strawberry Preserves (Click here for more information)
Vanilla Extract (Click here for more information)
Mascarpone Cheese (Click here for more information)
Heavy Cream (Click here for more information)
Dark Chocolate (Click here for more information)
Strawberry Jell-O (Click here for more information)
Oxy-Sorb Packages to keep food dry (Click here for more information


Thursday, January 7, 2016

Hokkaido Chiffon Cupcakes 北海道雪紡杯蛋糕


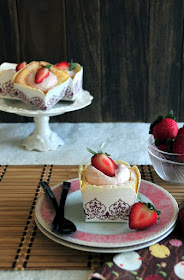
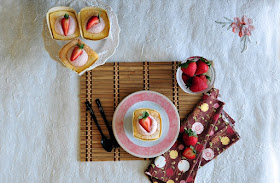
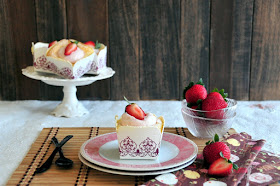
Have you ever tried the Hokkaido Chiffon Cupcakes from the Asian Bakery Stores?  With the whipped cream on top, they are light as clouds, super silky, yet decadent.  They come in different flavors these days, such as mango, green tea, & etc.  The Hokkaido Chiffon Cupcakes are usually baked in these adorable square-shaped baking cups!  Even though these cupcakes sell at over $3 USD each, it’s hard to resist sometimes.  But now, you can affordably make them at home, with ease, using much better ingredients!

Check out the step-by-step video tutorial on how to make Hokkaido Chiffon Cupcakes 北海道雪紡杯蛋糕!  These are super light and fluffy cupcakes that will melt in your mouth.  Refreshing and decadent at the same time.  http://uTry.it


For your convenience, I’ll put the links at the end of this post so you know where to get these baking cups and other tools that I used in this post.  These paper baking cups are easy to use and they do stand up to the heat during the baking process.  I’ve got some round ones and they are just as adorable and convenient.  They are easy to transport, which makes them quite perfect for sharing or taking to parties/gatherings as well.


Check out the step-by-step video tutorial on how to make Hokkaido Chiffon Cupcakes 北海道雪紡杯蛋糕!  These are super light and fluffy cupcakes that will melt in your mouth.  Refreshing and decadent at the same time.  http://uTry.it


If you’re looking for a fun and cute recipe to share with your valentines, give this recipe a try and I’m sure he/she will be impressed!  These cupcakes are the perfect dessert to end a romantic meal.  In my case, these are my kids’ favorite after school snacks. 


Check out the step-by-step video tutorial on how to make Hokkaido Chiffon Cupcakes 北海道雪紡杯蛋糕!  These are super light and fluffy cupcakes that will melt in your mouth.  Refreshing and decadent at the same time.  http://uTry.it
      

Did I mention that removing the wrapping cup is as much fun as eating one?  Of course, you can be fancy and use a little spoon to enjoy these cupcakes as well.  But I always like opening the paper cups and adore the cake a little before devouring one!  I hope you enjoy today’s video tutorial and recipe.  If you haven’t done so, please subscribe to my YouTube channel here.  You’ll be the first to know when I have new video tutorials published. 


Check out the step-by-step video tutorial on how to make Hokkaido Chiffon Cupcakes 北海道雪紡杯蛋糕!  These are super light and fluffy cupcakes that will melt in your mouth.  Refreshing and decadent at the same time.  http://uTry.it


Tools and ingredients used:

Paper Baking Cups (Click here for similar product)
Vanilla Extract (Click here for more information)
Stand Mixer (Click here for more information)
Butter (Click here for more information)
Cooling Rack (Click here for more information)