Pages

Thursday, March 29, 2012

Chicken Pot Stickers--雞肉鍋貼/餃子—With Video Tutorial

161edited-1

I’m sure many of you have ordered pot stickers when you dine out at Asian restaurants.  Pot Stickers, 餃子 in Chinese, are dumplings originated in China and widely spread to the rest of Asia.  Pot stickers usually consist of ground meat and/or vegetable filling wrapped into a piece of thinly rolled dough.  Boil or pan fry and serve with a soy-vinegar dipping sauce.  Don’t worry, I won’t make you roll your own dough from scratch today! hahaha….I love the pre-made pot sticker wraps because they are convenient and much thinner than rolling your own dough at home.


159edited

Ingredients for these pot sticker are very simple.  In this particular recipe, I used ground chicken with cabbage.  You can definitely use any kind of meat you like, ground pork, turkey, even minced shrimp or a mixture of any two.  Ground chicken and pork fillings are the more traditional ones.  I sautéed the shredded cabbage, let it cool and mixed into the chicken along with other marinates to create the filling.  When you’re ready to wrap the pot stickers, have the following items ready.  From the picture below, going clock-wise starting from the top left, the fillings, a pair of chopsticks (if you get good control of them) or use a spoon to scoop the fillings, a small bowl of water that works as “glue” for the wraps, a lightly floured mat/sheet pan for the wrapped pot stickers to land onto, a piece of napkin (yes, wrapping and filling can get messy sometimes, I rather be prepared) and last but not least, the pot sticker wraps.


Ingredients

Simple enough, right?  Winking smile  And oh, thanks to this fry-steam method, cooked pot stickers are golden brown and crispy on the outside, tender and juicy inside.  Don’t worry, we’ll get into all these juicy details with a video below.  Look at these pot stickers.  Aren’t they calling your name?  They are certainly calling mine….especially I know how scrumptious they are.  I’m so glad I still have another batch in the freezer waiting for me whenever I’m ready to cook them.  Oh yes, they freeze really well and I’ll tell you how to do that in the recipe below.  Best of all, you don’t (and should not) need to defrost them before cooking!


Close Up

Ready to watch the video?  Click away, it’s a short video and so worth watching.  I’ll show you all the important steps in filling, wrapping, and cooking these pot stickers.  Smile


See, no hoops to jump through, right?!  From now on, you don’t have to order the pot stickers from the restaurants.  These will definitely taste better than the restaurants’ or the store-bought ones!   Winking smile At least, my hubby said so!  (he’s such a smart man…hahaha…)


197edited


Friday, March 23, 2012

Raspberry and Rose Madeleine

026edited

Spring is officially here.  I’m all ready with the warmer weather, more outdoor activities with the kids, and longer daylight in the late afternoon.  The longer daylight translates to wider time frame for my natural-light food photography session.  Those of you who adore natural light for photography should know what I’m referring to.  Smile  If not, never mind, let’s talk about these little tea cakes instead.

016edited

Besides the warmer temperature, this Raspberry and Rose Madeleine embraces me with the senses of Spring.  The rose and raspberry aromas and the delicate interior of these little tea cakes are perfect for any Spring time tea party, bridal or baby showers, and the likes.  I really enjoy these little tea cakes along with a cup of tea in the warm afternoon.  They are the perfect pick me up, in my opinion. 


048edited

If you’re not familiar with Madeleine, it is a traditional small sponge cake from Commercy and Liverdun, the northeastern region of France.  Madeleine got it’s shell-like shape from the baking pan with shell-shaped depressions.  This is the Madeleine Pan I used.  I love this non-stick Madeleine pan because it’s easy to clean up, and gives the Madeleine some golden brown and crispy edges.  Along with the soft and spongy interior, it’s the perfect little tea cake. 

064edited

Thank you for stopping by today and I hope you will enjoy today’s post and recipe.  Take care and I’ll see you next time.

176edited


Wednesday, March 21, 2012

“Marshmallow Madness!” Cookbook Giveaway Winner Announcement

 
037edited
 
Thank you everyone who entered the “Marshmallow Madness!” cookbook giveaway…..and the winner is……
 
Random Result
 

Cindy B. Who said, “I like uTry.it's Facebook Page.”

Congratulations, Cindy!  Yay!  I’ll be emailing Cindy B. on how to claim her prize.  Thank you everyone for participating.  Special thank you to Quirk Books and Shauna for providing a copy of this book for the giveaway!


Reminder:  If you haven’t enter the $100 Amazon Gift Card giveaway yet, you have until March 30th to enter.  Click here and will take you to that post.  Good Luck!

Sunday, March 18, 2012

Mocha Hazelnut Biscotti—With Step-by-Step Pictorial

035edited-a

If you’ve missed my post, along with a video tutorial, on how to peel hazelnuts, here’s the link to the post.  Trust me, you want to watch the video before you attempt to peel these nuts.  Smile

Before and After

I love chocolate and hazelnuts together.  It’s one of my favorite combination of flavors.  The idea of adding the espresso into these hazelnut biscotti and make them Mocha?  Priceless!  I was planning to dunk these biscotti in coffee anyway, so why not?  Smile with tongue out  Just in case if I’m too lazy to do the dunking, the espresso is already in the cookies.  LOL….who am I kidding, I guess I’m never “too lazy” with my treats and desserts.   

003edited

These Mocha Hazelnut Biscotti are easy to make.  Here’s what you need to do….

1) Add the butter and sugar in your mixer
2) Beat them until light and fluffy
3) Add 2 eggs, one at a time
4) Add vanilla extract

Step By Step-A

5) Add chocolate liquor
6) Follow by espresso mixture
7) Beat until incorporated
8) In a separate bowl, add flour, cocoa powder, baking powder and salt

Step By Step-B

9) Whisk until well combined
10) Add the dry ingredients into the wet
11) Roll out the dough and fold in hazelnuts
12) Form into 2 logs and brush egg white on top

Step By Step-C

13) Bake at 350 degree F for about 20 minutes until the tops are slightly cracked and glossy
14) Using a sharp serrated knife, cut the logs diagonally into 1/3-inch-thick slices
15) Arrange the slices on the baking sheets; bake for about 20 minutes, or until dry
16) Partially dip the biscotti in the melted chocolate; place them on the lined baking sheet and refrigerate until the chocolate is set

Step By Step-D

It seems like there are quite a few steps in the process but they are all easy steps.  These Mocha Hazelnut Biscotti are totally worth it.

115edited

I love the light, crumbly and crunchy texture of these biscotti.  They are packed with mocha flavor and nutty hazelnut aroma.  Since they are twice baked, feel free to dunk them into your favorite hot beverage, such as tea, coffee, mocha, etc.  The biscotti can stand the heat and moisture and won’t fall apart on you!  Winking smile

166edited


Just a quick reminder of my current giveaways, simply click on the links below to enter:

Marshmallow Madness cookbook – deadline to enter 3/20/2012
$100 Amazon Gift Card – deadline to enter 3/30/2012


Thursday, March 15, 2012

How To Peel Hazelnuts—With Video Tutorial

033edited

Have you ever came across something that is too good to not share with your friends?  Well, this post and the 'How-to' video are definitely one of those moments for me.  I love hazelnuts, but not so much in peeling them…until I discovered this simple method to peel them nicely and cleanly in just a few minutes. 

The old method that I used was to first toast the nuts, then rub them between a kitchen towel to remove the skins.  Not only it takes forever to remove the skins, they often ended up only partially peeled.  Plus, I get hazelnuts skin all over my kitchen towel, counter top, kitchen floor, and myself.  Yikes….not a pretty picture, my Friends.  That really drove me NUTS!  You might ask why bother peeling them, right?  Actually, I don’t mind the added color of the skins at all.  However, the skins often turn a little too bitter for my taste buds after they are toasted.  So, I really prefer them peeled.


061edited

Ready to find out how to peel these little nuts nice and clean in just a few minutes? Check out the video below. You’re going to love it! Winking smile

With this easy method in peeling hazelnuts, expect more treats that are involved with hazelnuts in future posts.  For now, you can check this, this, this and this out.  Boy, I can’t believer I have already created so many hazelnuts creations!  I think I really love hazelnuts.  Open-mouthed smile


By the way, I pat dried the peeled hazelnuts with a paper towel and lay them on a sheet pan.  Then toasted them for 15 minutes at 350 degree F.  They turned out crunchy, toasty and fragrant.  I ended up keep popping them as snacks.  Smile


Saturday, March 10, 2012

Strawberry Marshmallows—Marshmallow Madness! Giveaway

 
152edited

Ever since I made my very first batch of homemade marshmallows, I’ve never look back to the store bought options.  So, when the kind folks from Quirk Books offered me a review copy of “Marshmallow Madness!”, by Shauna Sever, I jumped right at the opportunity. 

075edited

Marshmallow Madness!” is a delightful cookbook that shows you how to create dozens of marshmallows flavors and shapes, from strawberry and banana to sea salt caramel swirl and margarita marshmallows.  Also, included are inspiring ideas for crafting these gooey treats made with mallow, and much, much more. 

037edited

If you have never made your own marshmallows before, don’t get intimidated.  Shauna’s book came with detail instructions and explanations on tools and techniques.  It feels like she’s in the kitchen with you, guiding you through step by step.  Most of Shauna’s recipes are egg-less (based on gelatin and sugar syrup), verses using egg-white meringue .  As Shauna explained in her book, the egg-less version result in sturdier mallows and avoid issues of food allergies and raw egg whites. 

Unfortunately, the first 2 trials of my egg-less version of mallows turned out a bit too firmed for me to shape them properly.  So, I added egg white into Shauna’s strawberry mallow recipe on my 3rd trial and they came out fluffy and beautiful.  I’ve never had issues with raw egg whites, if that’s a concern for you, try to use pasteurized egg whites or stick with Shauna’s recipes.  (Note: the pasteurized egg white might take a longer time to whip up but they eventually will.)

Mallow in Progress

Ready to take a peek inside the book?  Have some tissue paper ready, you might drool a little.  It’s okay, I won’t tell. Smile with tongue out

047edited

See the varieties of creations that you can do with mallows?  Hm….I wonder what I should try next! Mallow Cones or S’mores cupcakes?  The Salted Caramel Swirl and the Key Lime Pie Mallows are calling my name, too!  These are just a few examples of what you can make with mallows, and there are so many more wonderful creations from the book.

Inside the Book

These Chocolate-Filled Vanilla Marshmallows are just as tempting!

039edited

The Strawberry Marshmallows I made from “Marshmallow Madness!” are wonderful.  Not only there are real strawberries puree in them, the recipe also called for folding in freeze-dried strawberries at the end.  You can imagine, the strawberry flavor is very intense.  I love the tartness from the strawberries which balanced perfectly with the sweetness from these mallows.  Just one bite…I’m in strawberries heaven. These are fluffy, pillow-ey, strawberr-ey goodness.

090edited

So, are you ready to make your own marshmallows at home?  Here’s a chance to win your own copy of “Marshmallow Madness!”, courtesy of Quirk Books and Shauna.  Here are the details:

One lucky uTry.it reader (with an U.S. or Canada mailing address) will win a copy of
Marshmallow Madness!”.  To enter, simply leave a comment and tell me what’s the most extreme/unusual flavor of marshmallow that you’ve ever tried.  Or, just tell me what new flavor you want to try.  Deadline to enter is March 20th by mid-night PST.  Winner will be selected through Random.org and announce shortly after the giveaway is closed.

This giveaway is now closed.  Thank you everyone for entering.


For extra entries, do any or all of the following (leave a separate comment for each extra entry):
1)  Add me to your Google+ circle here
2) "Like" uTry.it's Facebook Page, click here.
3) Follow uTry_it on Twitter, click here.
4) Follow uTry.it on Pinterest, click here.
4) Share this giveaway with your Facebook friends.


Good Luck everyone.


214edited
 

Disclaimer: I received a copy of “Marshmallow Madness!” free of charge for the purpose of this review. I was not compensated in any other way.  All opinions are 100% my own and always will be.


Thursday, March 8, 2012

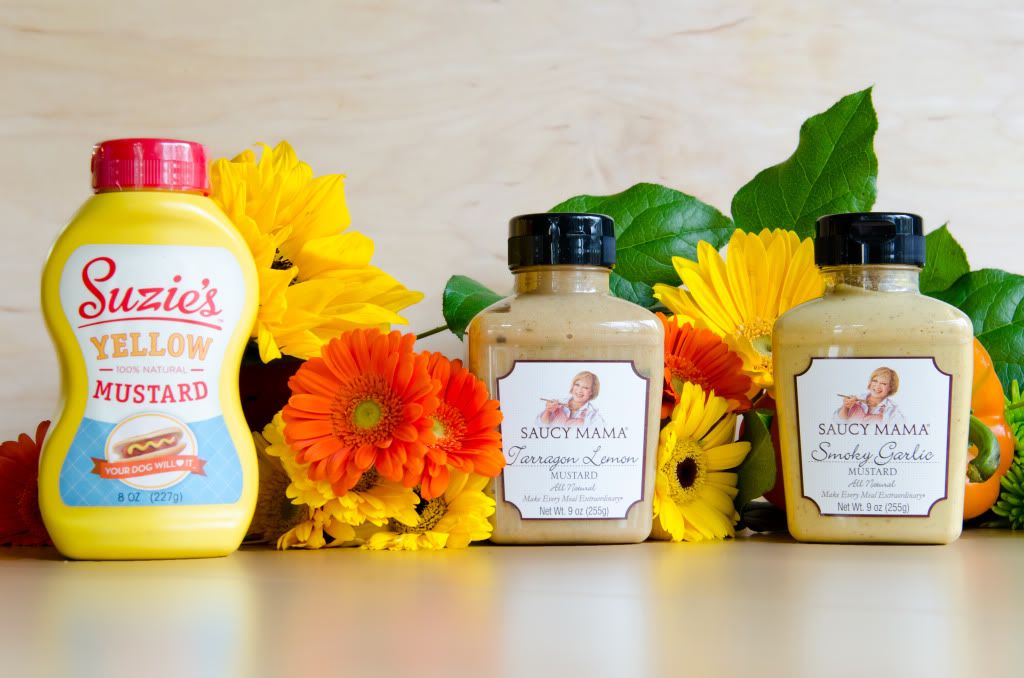
Winner Announcement for The Saucy Mama Condiment Kit


Thank you everyone who participated in the Saucy Mama Condiment Kit Giveaway.  I also want to thank everyone for voting on my Saucy Mama Cooking Contest entry.  I truly appreciate your help and supports.


I'm so happy to find out that I'm one of the top 10 finalists.  Check out the announcement here on Saucy Mama's Site.  The top ten recipes (as voted by the public) will be tested and rated by the Saucy Mama Judging Panel.  Winner will be announced on March 20th.  


But for now, we have a lucky uTry.it winner for the Saucy Mama Condiment Kit!  And the winner is.....


CaroleWho wrote..."I like Saucy Mama on FB".  Congratulations, Carole!  I'll be in touch with you shortly.  I'm sure you'll enjoy and love the Saucy Mama products.

Thank you, Barhyte Specialty Foods for sponsoring the prize on this giveaway!    


Please remember to participate in the $100 Amazon gift card giveaway here.  There's still time to enter.  There will be another giveaway coming up soon.  Stay tuned.

Sunday, March 4, 2012

Lemon Scented Thumbprint Cookies

203edited

March 20th will be the first day of Spring.  With the warm temperature in L.A., I feel like Spring has arrived…last month.  Smile with tongue out  Anyhow, these Lemon Scented Thumbprint Cookies gave me the same feeling that Spring has arrived.  I love the colors of the jams and curds that sit of top of the cookies.  Vibrant, vivid, and very delightful.  They just put a smile on my face.  Smile

187edited

I filled these Lemon Scented Thumbprint Cookies with some home made Meyer Lemon curds (recipe here), orange marmalade and raspberry preserves.  I’ll shared the orange marmalade and raspberry preserves recipe in future posts.  If you have your own favorite recipes, by all means go for it.  Otherwise, using store bought jams are just as good.  But I have to tell you though, the curds and and preserves are really easy to make and they taste wonderful. 

135edteid

These cookies are fun to make.  It’s a great time to get the kids into the kitchen to help rolling and pressing the dough, too.  To make the indentation for the filling, I’ve tried using the back of a wooden spoon and a measuring teaspoons.  But nothing works better than my thumb!  Dah…these are called thumbprint cookies for a reason, I was thinking out loud!  Smile with tongue out  Silly me.

Before you go, don’t forget to enter the current Giveaways on my blog. 

For the $100 Amazon Gift Card (who doesn’t like Amazon, right?)  Click here to enter.  Deadline to enter is March 30th, 2012.

For the Saucy Mama Condiment Kit (delicious products), click here to enter.  Deadline to enter is March 7th, 2012.

Good Luck and Happy Baking!