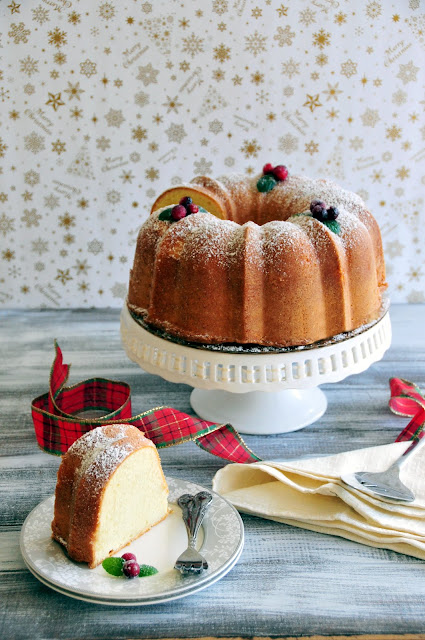
Did you have a chance to check out the Frosted Cranberries recipe and video tutorial from last week? If not, simply click here to check it out. Those cranberries make the most festive and gorgeous garnish on top of this Classic Bundy Cake? Don't you agree?

It’s amazing how a few little edible gems and some fresh mint leaves can turn this simple cake into your best holiday dessert! It’s gorgeous enough for the celebration, yet simple enough for everyday enjoyment. Best of all, this cake can feed a village! And yes, I make this cake quite often.

This Classic Bundt Cake is wonderful when it’s freshly out of the oven. You get the slightly crispy edges along with moist and tender interior. But as I said, it’s a huge cake, and a small family like mine definitely won’t finish it all in a day, no matter how much we love cake! The great news is, this cake freezes really well. I usually let it completely cool to room temperature. Slice the whole cake into desire thickness (usually around 1 1/2-inch). Then, lay the slices flat into a tightly sealed freezer safe ziploc bag, and into the freezer they go.

When I’m ready to serve them again, I take the desire number of slices I want. Then, they go straight onto a non-stick saute pan. You don’t need to grease the pan nor defrost the cake ahead of time. Put on low heat and warm up the cake on both sides until the edges turn slightly golden brown and crispy. You’ll get a nice crispy outer crust and super tender interior! I say, they’re even better than the day it came fresh out of the oven! Give this method a try and I’m sure you’ll love it too!

Last but not least, I want to wish you all a Blessed and wonderful Christmas! It’s a wonderful time for most people, but please also remember that it could be hard for many out there who miss their loved ones. Life is full of unexpected events. So, cherish what you have and the people around you. Give them an extra kiss, a tighter hug, and don’t forget to tell them that you love them!
I’ll be back next week before the new year and share a fun appetizer/snack with you in case you’re throwing a party to ring-in the New Year! Stay tuned!

Tools and ingredients used:
Classic 10-inch Bundt Cake Pan (click here for more information)
Mikasa Something Borrowed Desert Plates (Click here for more information)
10-Inch Ribbon Cake Stand (Click her for more information)
Calphalon Nonstick 2-Piece Baking Sheet Set (Click her for more information)
KitchenAid Stand Mixer (Click here for more information)
Cake/Pie Server (Click here for more information)
Small Forks for Dessert (See similar product here)
Kerrygold Pure Unsalted Butter (Click here for more information)
Cooling Rack (Click here for more information)
Classic Bundt Cake:
Makes: one 10-inch Bundt
3 sticks butter, room temperature; plus 1 tablespoon for coating the pan
2 1/2 cups sugar
1/2 teaspoon kosher salt
2 teaspoon vanilla extract
7 large eggs, room temperature
3 cups cake flour; plus 1 tablespoon for coating the pan
1 cup heavy cream, room temperature
**Frosted Cranberries and Mint to garnish
Preheat oven to 325F degree. Butter and flour a 10-inch Bundt pan.
In the bowl of the stand mixer fitted with the paddle attachment, with medium speed, cream the butter, sugar and salt together for 5 minutes until light and fluffy. Scrape the sides of the bowl to make sure the ingredients are well incorporated.
Add the vanilla extract, then the eggs, one at a time. Turn mixer to low, then add the cake flour and heavy cream, alternately; starting with flour and ending with flour. Scrape the sides of the bowl if necessary. Mix until the batter is just fully incorporated.
Pour the batter into the prepared bundt pan. Bake for 1 hour and 15 minutes, or until a skewer inserted in the middle of the cake and comes out clean. Cool on wiring rack for 30 minutes, then remove cake from the pan onto a cake board/serving plate. Place the cake on a wiring rack and cool for another 30 minutes before serving.
**Here’s the link to the Frosted Cranberries recipe:
(http://utry.it/2015/12/frosted-cranberries-candied-cranberries.html)
Note: if you cannot finish the cake on the first day, slice it into desired thickness and place inside freezer safe Ziploc bags and store in freezer. When ready to serve, place frozen sliced cakes in a non-stick pan (no need to grease the pan). Heat a few minutes on low heat until edges are golden brown! This is my favorite way to enjoy this cake as the crispy edges compliment the soft and tender interior really well. Enjoy!

I love the smooth and light texture!
ReplyDeleteHappy Holidays, Amy!
Angie
Simple yet very pretty~ I'm sure it tastes awesome too. Merry Christmas to you and your family Amy!
ReplyDeleteWhat s pretty cake! Must taste great too!
ReplyDeleteabsolutely gorgeous!!! xx
ReplyDeleteWhy did you not use baking powder, or baking soda.
ReplyDeleteBecause you don't need it. In the process of beating the butter with the sugar, you incorporate enough air into the batter to make it rise. And the cake flour makes the cake more tender compared to all purpose flour. Hope it helps.
Delete