Friday, December 15, 2017

How to Make Popovers with Herb Butter (Foolproof Recipe)


Are you ready for the holidays?  My kids are almost out of school for their Winter Break and we’re already getting excited for the time off.   I personally can’t wait to hang out and spend time with the family.  We’ll have relatives visiting from overseas and everyone in the family is looking forward to that as well.  How about you?  What are your plans for the holidays?  Leave me a comment below and let me know.

How to Make Popovers with Herb Butter (Fail Proof Recipe)  http://uTry.it

For our holiday meals, my family prefer Prime Ribs over poultry or pork.  This past Thanksgiving, I even spared Mr. Turkey and made a Prime Rib Roast instead.  Besides all sorts of roasted vegetables, I also made these Popovers with Herb Butter as a side dish.  Everyone enjoyed them so much.  They are quite similar to Yorkshire pudding, which its batter consists of  eggs, flour, milk, etc.  I guess you can call these individual Yorkshire puddings?  But the traditional Yorkshire pudding often consists the roast beef’s dripping in the batter while these Popovers don’t.  However, these Popovers still packed with wonderful flavors and aromas from herbs and butter in the batter (and on the side).

How to Make Popovers with Herb Butter (Fail Proof Recipe)  http://uTry.it

These Popovers are simply amazing.  The crust is golden brown and crispy while the inside is fluffy and airy.  It’s heavenly when you serve them warm with a dab of Herb Butter.  Check out my video tutorial for tips and tricks on how to prepare both!  These popovers are pretty much fail proof if you follow my tips.  Your family will definitely love them and be prepare that they’ll ask for seconds.  My recipe makes exactly 12 popovers.  I’ll list the popover pans and other tools that I used at the end of the post for your convenience.  

How to Make Popovers with Herb Butter (Fail Proof Recipe)  http://uTry.it

When I made these popovers again to take pictures and videos, my Kids were so excited and couldn’t wait any longer (see the little hand in the picture above)?!  Yes, these Popovers are truly irresistible!  


How to Make Popovers with Herb Butter (Fail Proof Recipe)  http://uTry.it

Instead of making the traditional dinner rolls, I highly recommend that you try out this Popover with Herb Butter recipe.  You and your tummy will be glad that you did!  Thank you so much for stopping by today.  Stay tuned for more holiday recipe next week!

Tools and Ingredients Used:Popover Pan (Click here for more information)
Baking Sheets (Click here for more information)
Kerrygold Butter (Click here for more information)
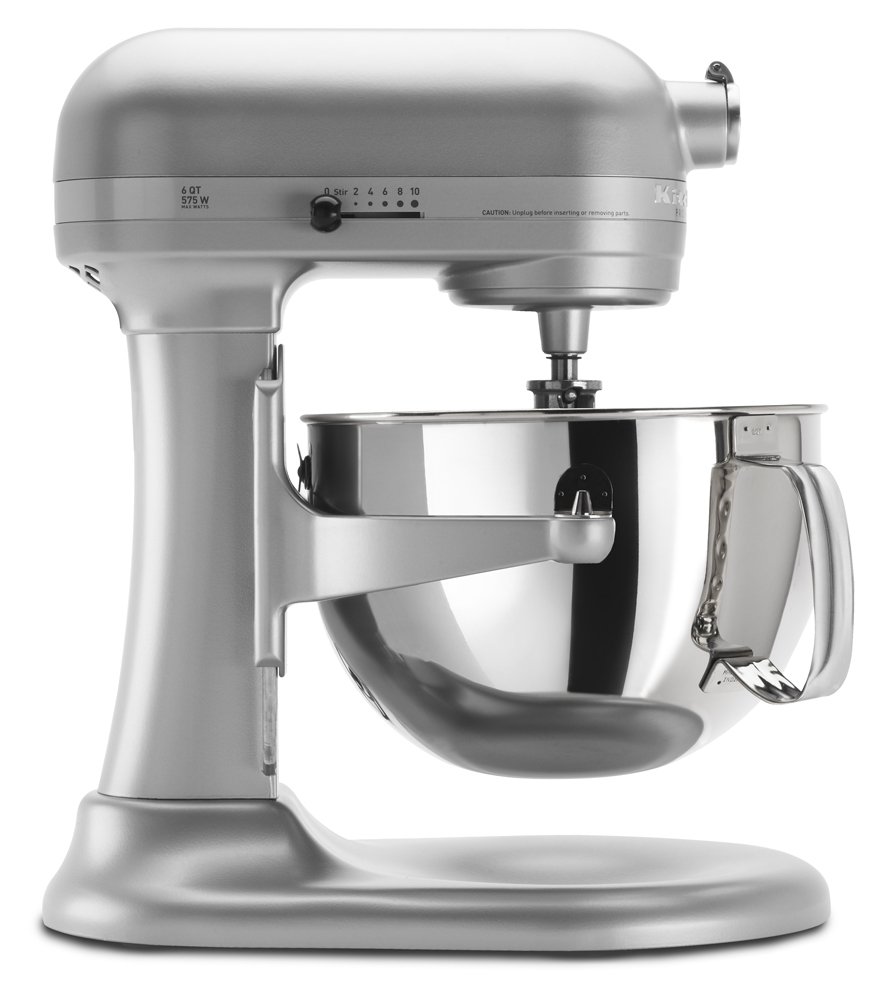
Stand Mixer (Click here for more information)
Kitchen Scissors (Click here for more information)
Measuring Cups with Beaker (
Click here for more information)
Whisk (Click here for more information)
Cooling Racks (Click here for more information)


Disclosure: uTry.it is a participant in the Amazon Services LLC Associates Program, an affiliate advertising program designed to provide a means for sites to earn advertising fees by advertising and linking to Amazon.com.


Friday, December 8, 2017

How to Fold Christmas Tree Napkins – A Festive Holiday Tablescape and Place Card Idea


Are you ready for the holiday?  If you’re hosting a Christmas party this year, I have a wonderful tablescape and place card idea for you.  I promise, it’s quick, easy, and festive!  After all, we don’t want to spend all day fixing/setting the table while we have a feast to prepare, don't we?  On a side note, my kids are into origami (art of paper folding) and therefore they totally enjoyed folding these Christmas Tree Napkins.  So, you might want to put your little helpers to work as well!  Yes, it’s so easy that kids can do it too!

How to Fold Christmas Tree Napkins – A Festive Holiday Tablescape and Place Card Idea   http://uTry.it

See how festive this table setting is?  In addition to the visual, I wish you can smell it too.  Because I added a cinnamon stick to mimic the tree trunk and the whole plate simply smells wonderful.  I think cinnamon is one of my favorite aroma for the holidays!  It’s warm and earthy.  I feel so relax and calm sniffing it in!   

How to Fold Christmas Tree Napkins – A Festive Holiday Tablescape and Place Card Idea   http://uTry.it

I tied a little bow tie with Christmas colored ribbon on the cinnamon stick (or you can use kitchen twine as well) so that your guest can take it home and hang it on their Christmas tree after the party!
  
How to Fold Christmas Tree Napkins – A Festive Holiday Tablescape and Place Card Idea   http://uTry.it

The step-by-step pictorial above give you an idea of the steps.  But since I created a video tutorial for you, I think it’s even easier to just watch the video and follow along.  Have fun with this little project! And below are the materials you’ll need for this Christmas Tree Napkin!  Stay tuned for more festive recipe next week!


Christmas Tree Napkins:
Makes: 1 tables setting (simply multiply with number of guests/settings needed)

1 square green napkin  (
Click here for more information)
1 cinnamon stick (
Click here for more information)
1 (12-inch) long ribbon or kitchen twine (
Click here for more information)
1 Gold star sticker (
Click here for more information)
1 Christmas Berries sticker (
Click here for more information)
1 small holiday post-it (
Click here for more information)
Green Handle Flatware (Click here for more information)
White Dinner Plates (Click here for more information)
Silver Charger (Click here for more information)


Disclosure: uTry.it is a participant in the Amazon Services LLC Associates Program, an affiliate advertising program designed to provide a means for sites to earn advertising fees by advertising and linking to Amazon.com.


Friday, December 1, 2017

How to create a 3D Winter Wonderland - Classic Sugar Cookies with Royal Icing


Are you ready for the holiday baking season?  Traditionally, I have always been busy baking goodies for friends and family during the holidays!  What are your favorite things to share around the holidays?  This year, I have created these whimsical 3D Winter Wonderland Sugar Cookies.  Be sure to check out the tutorial above on how I make them.

How to create a 3D Winter Wonderland -  Classic Sugar Cookies with Royal Icing    http://uTry.it

These 3D cookies are made out of Classic Sugar Cookies and decorated with Royal Icing.  Not only these cookies are crispy (with a hint of butter and vanilla), they are also more sturdy and can hold up to the decorations better than other kind of cookies.   According to my Little Girl, these cookies are perfect for dunking in a cup of hot cocoa! Does she talk like a foodie or what?!  In addition to these Classic Sugar Cookies, I also made a variation of a chocolate flavored ones.

How to create a 3D Winter Wonderland -  Classic Sugar Cookies with Royal Icing    http://uTry.it


In this 3D Winter Wonderland, you will find Christmas Tree, Snowman, Reindeer and Santa’s Sleigh that are all made of cookies.  As shown in the video above, they are cut from from a 3D cookie cutter set that I bought online from awhile ago. 

How to create a 3D Winter Wonderland -  Classic Sugar Cookies with Royal Icing    http://uTry.it


How to create a 3D Winter Wonderland -  Classic Sugar Cookies with Royal Icing    http://uTry.it

In addition to Snowman and Christmas Trees, I also created a few gift box/present cookies to place in front of the Christmas Tree!  We’ve got to have some presents for the holidays, right?  The great news is that you don’t need a cookie cutter to make these gift boxes.  Check out my video tutorial and I’ll show you step by step on how to make them.  They are easier to make than they look, and they are super delicious with a layer of chocolate sugar cookie stacked in the middle! 

How to create a 3D Winter Wonderland -  Classic Sugar Cookies with Royal Icing    http://uTry.it

How to create a 3D Winter Wonderland -  Classic Sugar Cookies with Royal Icing    http://uTry.it


How to create a 3D Winter Wonderland -  Classic Sugar Cookies with Royal Icing    http://uTry.it

How to create a 3D Winter Wonderland -  Classic Sugar Cookies with Royal Icing    http://uTry.it

So, which one is your favorite?  I personally love the present/gift box and the Santa’s Sleigh cookies the best.  Best of all, just a few simple sprinkles and icing can transform these ordinary sugar cookies into something so amazing!  I hope you’ll give this recipe a try and make them for your family and loved ones.  My kids and I had so much fun decorating these cookies together.  They could be a fun holiday activities with your kiddos as well.  Stay tuned for more fun and festive holiday recipes!

How to create a 3D Winter Wonderland -  Classic Sugar Cookies with Royal Icing    http://uTry.it


Tools and Ingredients Used:
3D Christmas Cookie Cutter Set (Click here for more information)
Natural Food Coloring (Click here for more information)
Meringue Powder (Click here for more information)
Valrhona Unsweetened Cocoa Powder (
Click here for more information)
Silver Dragee (
Click here for more information)
Fall Color Sprinkle Pearls (
Click here for more information)
Christmas Sprinkle (
Click here for more information)
Star Shape Sprinkle (
Click here for more information)
Organic Vanilla Extract (
Click here for more information)
Kerrygold Butter (
Click here for more information)
Organic All-Purpose Flour (
Click here for more information)
Rolling Pin with Adjustable rings (
Click here for more information)
Pizza Roller (
Click here for more information)
Cooling Racks (
Click here for more information)
Rolling Mat (
Click here for more information)
Food Decorating Tongs/Tweezers (
Click here for more information)
Measuring Cup Set (
Click here for more information)
Stand Mixer (
Click here for more information)
Silpat (
Click here for more information)
Baking Sheets (
Click here for more information)


Disclosure: uTry.it is a participant in the Amazon Services LLC Associates Program, an affiliate advertising program designed to provide a means for sites to earn advertising fees by advertising and linking to Amazon.com.


Tuesday, November 21, 2017

Holiday Gift Guide For Foodies


Have you started your Holiday shopping yet?  Honestly, I do most of my shopping online these days.  After all, circling around the shopping mall parking lot looking for a parking spot and lining up long queues at the cashiers aren’t exactly my favorite things to do around the holidays!  I would rather spend the time with my family or bake up a batch of holiday cookies like these and enjoy a cup of hot cocoa!  If you love shopping online like I do, I have a few wonderful picks for you to surprise the foodies in your life (or if you want to treat yourself to a wonderful gift this holiday)!  Just a quick note, I do own most of the products that I listed here and love their quality.  These products either make my life easier, or they’re just simply cool!  For your convenience, simply click on the title or the image and it'll take you to the product page.    

1) Joseph Joseph Adjustable Rolling Pin
Perfect for the OCD baker in your life who wants everything perfect and in precision!  After all, it’s much nicer if your sugar cookies come out in even thickness than lop-sided!  I totally understand the frustration.


2) Anova Sous Vide Precision Cooker

It’s the latest trend for the home cook who is a restaurant chef “wanna be”!  Well, pretty much anyone who wants to produce restaurant quality food without paying the high price or dining out!  I got this as a birthday gift and totally love it!   After all, I think my brother knows me well!  I love that you can connect to the app on your phone to control the settings and browse for hundreds of recipes that go along with it! 


For the foodie who owns every single piece of small appliances in the kitchen!  This is a wonderful gift for the Asian cuisines lovers!  I use it almost every single day.  You can program it to cook regular rice, brown rice, sushi rice, mixed rice, porridge, etc.  Never have to burn another pot of rice on the stove or wash up the sticky pot!  The bowl of this rice cooker is super non-stick!  Perfect for someone who loves rice but hate washing dishes!

This stylish and unique Cast Iron Teapot set is perfect for the clumsy tea lover!  I used to have many sets of ceramic and glass teapots and somehow, they don’t last long in my kitchen!  I have a cast iron teapot since my college year and I still use it until now!  Beside being unbreakable, I also love the heat retention of the cast iron. 


For the sophisticate whisky and cocktail sipper who like to keep their drinks perfectly chilled without diluting it too quickly, you’ve come to the right place.  I personally love these ice molds and use them all the time.  Check out this cocktail, it’s perfect for the holiday too!


A fine gift for the adventurous foodies!  Take them to experience the Japanese tea ceremony without a plane ticket!  There are many benefit of drinking matcha green tea.  I found that the tea ceremony is very therapeutic as well. 


For the serious cupcake bakers who love taking their cupcakes to the next level but hate fondant decorations (a.k.a.: ME)!  This complete Russian Piping Tips Set has everything you need, and then some.  I’ve tried a few of these piping tips and totally love them.  So easy to use and the result are gorgeous.  You can check out my recipe and tutorial here: Chocolate Cupcakes with Swiss Meringue Buttercream Flowers


These Bubble Waffle are one of the latest trend on snacks!  You can serve them as is, turn them into a cone for ice cream, or break them apart and add to other desserts.  No matter how you serve them, they are fun to eat and very delicious.  Plus, who needs boring regular shaped waffles when you can eat Bubble waffles? Check out my recipes here: Chocolate Bubble Waffle Cone Ice Cream and Classic Hong Kong Bubble Waffle 


French Mille Crepe Cakes are the most gorgeous and most fascinating (probably most time consuming too) cake trend in the baking world.  That’s why the infamous crepe cake bakery can sell their cake at almost USD$100 and people still line up for it!  I like to make my own as I can control the flavor and ingredients that I use.  With this Crepe Maker, it’ll make the whole process much easier!  Check out my Mille Crepe Cake creations here: Unicorn Rainbow Mille Crepe Cake, Mango Mille Crepe Cake, and Vanilla Mille Crepe Cake


We all can use a little bit more flavor in life!  This Himalayan Salt Plate is so much fun to use and add so much flavors to your food!  You can cook it on the stove, in the oven, or even on the grill!  You can serve your food directly on the salt plate as well.  It’ll be a nice conversation starter to any party! 


11) French Pastry Cookbooks: Modern French Pastry, Patisserie French Pastry Master Class, Bachour The Baker
For the baker who is ready to take the next challenge!  You’ve got to check out these cook books and cook along!  You might be the lucky taste tester someday when you give these cookbooks as a gift!   Not a bad return, right?


It’s a perfect starter kit for someone who loves science and loves to ask why all the time!  Just kidding!  This is a fun starter kit to get into the molecular cooking.  It sure is fascinating and exciting to get your hands on these fun tools!  A perfect starter kit to cook with the curious kiddos as well.


I love my infrared thermometer and I do use it quite often.  I use it when I temper chocolate, make my ice cream base, or when I make candies (yes, ditch the candy thermometer, that thing is a pain to wash!) or when I want to look cool and professional in the kitchen.  But seriously, it’s so convenience that you won’t go back to the traditional thermometer!


You might not think much of kitchen scales (unlike their cousins, a.k.a. bathroom scales), but it is a must-have in my kitchen.  There are quite a few recipes that calls for weighting ingredients (especially in baking) rather than using measuring cups for precision.  I measure all my ingredients when I make the French Macarons!  When I need to divide batters for multi-layer cakes, or bread dough for buns, having a kitchen scales will make your life much easier.  If you know someone who loves baking or getting serious about baking, this will make a wonderful gift!


If you want to make someone really happy, you can’t go wrong with gifting a KitchenAid mixer!  I use mine often and they truly last for a long time, definitely worth the investment, in my humble opinion.  Since it’ll probably be sitting/residing on your (or the lucky someone’s) kitchen counter (it’s way too heavy and bulky to store in the pantry or move around), I suggest that you pick a color that matches the rest of your/their kitchen appliances.  I tested out both the Bowl-Lift style (Professional Series) and the Tilt-Head style (Artisan Series), I would definitely recommend the Professional Series.  Not only it is more powerful, it's also more steady compared to the Artisan series.  Best of all, it has a bigger capacity on the Professional Series.        


I hope you enjoy my recommendations.  They are all unique and fun gifts that foodies will enjoy!  Which one is your favorite so far?  Leave me a comment below and happy shopping!


Disclosure: uTry.it is a participant in the Amazon Services LLC Associates Program, an affiliate advertising program designed to provide a means for sites to earn advertising fees by advertising and linking to Amazon.com.

Thursday, November 16, 2017

How to Make Vanilla Dream Mille Crêpe Cake (香草千層可麗餅蛋糕)


Holidays are fast approaching!  How do you celebrate?  I truly enjoy spending time with friends and family around the dinner table to create more memories. 


How to Make Vanilla Dream Mille Crêpe Cake  http://uTry.it

This gorgeous and scrumptious Vanilla Dream Mille Crêpe Cake would be the perfect sweet ending to your holiday meals!  It consists layers and layers of French Crêpes, alternate with a layer of Vanilla Mascarpone Cream Filling.  It’s decadent, yet not too sweet. 

How to Make Vanilla Dream Mille Crêpe Cake  http://uTry.it


The cake itself is truly delicious.  This recipe featured Singing Dog Vanilla’s Organic Vanilla Extract in both the Crêpe batter and the Raspberry Sauce.  I used Singing Dog Vanilla’s Vanilla Bean Paste in the Mascarpone Cream fillings in between the Crêpe layers.  This cake is packed with floral and sweet vanilla aromas and you can see the vanilla specks throughout the cream fillings.  The texture is silky soft and tender.  I like to drizzle a little bit of homemade raspberry sauce on top for a festive and refreshing taste.

How to Make Vanilla Dream Mille Crêpe Cake  http://uTry.it

If you’re still searching for a dessert to share with your loved ones, look no further!  I’m sure your friends and family will love this cake!

How to Make Vanilla Dream Mille Crêpe Cake  http://uTry.it


Click here for the recipe: https://goo.gl/ww9PYa


Tools and Ingredients Used:
Singing Dog Vanilla's Organic Vanilla Extract (Click here for more information)Singing Dog Vanilla's Vanilla Bean Paste (Click here for more information)
Crêpe Pan (Click here for more information)

Crêpe Spreader (Click here for more information)

Electric Crêpe Maker (with spreader) (Click here for more information)

Lazy Susan (Click here for more information)

Ninja Blender (Click here for more information)

Irish Salted Butter (Click here for more information)

Pastry Bag and Star Tip set (Click here for more information)

Offset Spatula (Click here for more information)

Heat Proof Egg Turner (Click here for more information)


Disclosure: uTry.it is a participant in the Amazon Services LLC Associates Program, an affiliate advertising program designed to provide a means for sites to earn advertising fees by advertising and linking to Amazon.com.

Disclaimer: This video is brought to you by Singing Dog Vanilla.  All messages and opinions are 100% my own. 


Saturday, November 4, 2017

How to Make Baked Apple Hand Pies 蘋果批 (餡餅)


Are you enjoying the cooler temperature and the scenery of fallen red and golden Maple leaves?  I sure love them both.  But what I love even more are all the warm and hearty recipes that fit for Fall!  There should be no surprise that dessert always makes the top of my list!  These adorable and heart-warming Apple Hand Pies are definitely my favorite Fall dessert.  They are also both of my kids' favorite!  What a surprise!?  It’s seldom that they both love the same item or a dish!  So, I’m happy to bake up these cuties more often!

Welcome Fall with these Apple Hand Pies 蘋果批 (with video tutorial)  http://uTry.it

Many hand pie recipes are deep fried.  However, I don’t like to deep fry for obvious reasons.   To me, deep fry usually involved absorbing too much unnecessary oil and calories!  Besides, I don’t want to deal with a large pot of left-over oil and greasy smell in the kitchen as well.  So, I opt for a baked version!  These baked Apple Hand Pies are just as scrumptious and decadent, if not better, than the deep fried version!

Welcome Fall with these Apple Hand Pies 蘋果批 (with video tutorial)  http://uTry.it

The crust of these Apple Hand Pies is buttery and flaky, the apple filling is slightly sweet and tart, and very juicy.  The combination of earthy cinnamon and refreshing apples is simply heavenly!  These hand pies are fun to eat and very portable.  You can easily pack them for picnic or bring them to parties for sharing.  I shared them with some friends and they all loved them!

Welcome Fall with these Apple Hand Pies 蘋果批 (with video tutorial)  http://uTry.it

If you haven’t check out the video tutorial, please do so as I shared more tips and tricks in the video and you don’t want to miss them.   I hope you enjoy today’s post and recipe.  Please subscribe to my Youtube channel here.  That way, you won’t miss out on any future videos and you’ll be the first to know when I have a new tutorial published.  And remember, Eat, Drink, and Be Happy!  Stay tuned for more Fall and Holiday baking next week!

Welcome Fall with these Apple Hand Pies 蘋果批 (with video tutorial)  http://uTry.it


Ingredients and Tools Used:
Apple Shape Pocket Pie Mold (Click here for more information)
4-icnh Round Cookie Cutter (Click here for more information)
Mini Cookie Cutter Set (Click here for more information)
Organic Ground Cinnamon (Click here for more information)
Cooling Racks (Click here for more information)
Rolling Mat (Click here for more information)
Rolling Pin (
Click here for more information)
Measuring Spoons Set (Click here for more information)
Baking Sheets (Click here for more information)
Microplane Zester (
Click here for more information)
Whole Nutmeg (Click here for more information)
Organic Vanilla Extract (Click here for more information)
Kerrygold Butter (Click here for more information)
Organic All-Purpose Flour (Click here for more information)


Disclosure: uTry.it is a participant in the Amazon Services LLC Associates Program, an affiliate advertising program designed to provide a means for sites to earn advertising fees by advertising and linking to Amazon.com.


Friday, October 20, 2017

How to Make Creepy Eyeballs Halloween Brew – Kids Friendly Party Recipe 鬼異眼球萬聖節特飲


Will you be hosting a Halloween party this year?  If you do, you’ve got to check out this Creepy Eyeballs Halloween Brew Recipe 鬼異眼球萬聖節特飲!  When I tested out this recipe with my kids, they were so excited and had so much fun with it!  Yes, this is a kids friendly recipe.  But if you want to turn it into a cocktail for the grown ups, you can add 1/2 a cup of liqueur of your choice, such as vodka, tequila, or gin.  Or, simply substitute the club soda with some sparkling wine.  It’ll be just as delicious!

How to Make Creepy Eyeballs Halloween Brew – Kids Friendly Party Recipe 鬼異眼球萬聖節特飲   http://uTry.it

This recipe is so easy to prepare!  If you haven’t watch the tutorial yet, you’ve got to check it out now.  Not only you’ll see how simple this recipe is, but you'll also get to check out the special guest who demonstrated the tutorial for us.  Since I made this recipe just for my family, I kept it to a rather small portion.  If you are serving this at a party, you might want to multiply the recipe to accommodate the number of guests that you have. 

How to Make Creepy Eyeballs Halloween Brew – Kids Friendly Party Recipe 鬼異眼球萬聖節特飲   http://uTry.it

In today’s recipe, I added some dry ice for the smoky and spooky effect.  It’s so much fun to use and it’s simply amazing.  It totally transformed the drink and took it to a whole new level.  The dry ice is actually easier to obtain and more affordable than I thought.  I was wondering and googling where to buy the dry ice.  Turned out, it was available in several local supermarkets near me.   If you plan on using dry ice in your drinks, I suggest that you call your local markets to make sure they have it in stock before driving there.

How to Make Creepy Eyeballs Halloween Brew – Kids Friendly Party Recipe 鬼異眼球萬聖節特飲   http://uTry.it

I kept the dry ice in an insulated ice chest as suggested by the packaging (do not keep in the freezer or a closed environment as the dry ice will release carbon dioxide when it “melts”.)  I highly recommend that you get it right before or a couple of hours before the party if you plan to use it.   And make sure you follow the safety instructions on the package.

How to Make Creepy Eyeballs Halloween Brew – Kids Friendly Party Recipe 鬼異眼球萬聖節特飲   http://uTry.it

Ever wonder what dry ice is made out of?  Dry ice is the solid form of carbon dioxide.  It sublimates at –109.3F.  With its extremely cold temperature, we need to handle it with cautions and never touch the dry ice with your bare hands as you might get frostbite!  I was wearing gloves and using tongs when I had to add the dry ice to my drinks.  Don’t worry, the dry ice is totally safe!  Because of its heavier weight, the dry ice immediately dropped to the bottom of the glass/punch bowl.  Just make sure to sip your drink slowly so the dry ice is all melted by the time you finish your drink.  And it mostly will.  And please refrain yourself from getting the dry ice inside your mouth because it can burn your skin/mouth! 
 
How to Make Creepy Eyeballs Halloween Brew – Kids Friendly Party Recipe 鬼異眼球萬聖節特飲   http://uTry.it

Moving on to anther ingredient of this drink, the creepy eyeballs!  They are made out of canned lychees filled with fresh blueberries.  Lychee is one of my favorite tropical fruit to enjoy (check out this lychee martini recipe that I shared in the past and see how they look when they're fresh).  With a little bit of grenadine syrup added to the lychees, they sure looked like bloody eyeballs!  I’ll list the ingredients used at the end of the post for your convenience.

How to Make Creepy Eyeballs Halloween Brew – Kids Friendly Party Recipe 鬼異眼球萬聖節特飲   http://uTry.it

I hope you enjoyed today’s fun and easy recipe!  Leave me a comment if you have questions or if you’ve tried the recipe.  I would love to hear from you.  Remember, Eat, Drink, and Be Happy!  Stay tuned for more fun recipe next week!  Wish you all a happy and safe Halloween! 

Ingredients and Tools Used:
Grenadine Syrup (Click here for more information)
Cranberry Juice (Click here for more information)

Club Soda (Click here for more information)
Halloween Beaker Glasses (Click here for more information)
Halloween Glass Flask (Click here for more information)
Large Slant Cut Glass Bowl (Click here for more information)
Stainless-Steel Tongs (Click here for more information)
Insulated Foam Box (Click here for more information)


Disclaimers
Please follow manufacturer and safety instructions when handling dry ice.


Disclosure: uTry.it is a participant in the Amazon Services LLC Associates Program, an affiliate advertising program designed to provide a means for sites to earn advertising fees by advertising and linking to Amazon.com.

Sunday, October 15, 2017

Kid’s Bento Lunch Boxes Ideas


Hello Kitty Witch Hat

One of my favorite activities of the day is packing cute bento lunch boxes for my Kiddos.  As soon as October started, I’ve been making the lunch boxes with Halloween theme.  These lunch boxes are fun and festive.  It’s a way for me to send some love for the kiddos while they are at school.  The picture above is a spaghetti lunch box with Hello Kitty wearing a witch’s hat.  Kitty is made out of a slice of Muenster cheese.  The decorations are seaweed and soy wrappers.  The little pumpkin is a slice of carrot decorated with cut out seaweed. 

Frankinstein2

I love the Frankenstein bento as well.  It’s made out of a slice of Muenster cheese topped with a piece of green soy wrapper.  Click here to check out the package of soy wrapper that I used.  (I’ll list the tools and other ingredients at the end of this post for your reference as well.)   I absolutely love the soy wrappers as they are so colorful and easy to use.  Best of all, they are made with natural ingredients such as spinach, turmeric, and paprika to obtain those gorgeous bright colors. 


Ghost and Broom

Here’s a simple one with ghosts and a broom stick.  Click here to check out the video tutorial on how to make the witch’s broom and the little ghosts were made out of mozzarella cheese balls decorated with cut out seaweeds.

Cat with Witch Hat


Miso Noodle Soup

The picture above is a bowl of Miso Noodle Soup that I made for my Hubby.  I’m sure we can all use some sunshine.  I feel happy just by looking at the cute face on the egg.

Gudetama

Have you heard of Gudetama?  It’s a Japanese cartoon character of an lazy egg (see picture above).  Click here to check out their Facebook page for some funny videos.  My kids and I always enjoy watching them together!

Little Girl Hair

This little girl with spaghetti hair is one of my favorite.  It’s simple and adorable!

Little Bird and Nest


Little Chick and Bird

The little chick above is made with smoked salmon filled egg, check out this video for the tutorial and recipe.

LIttle Piggy


Minced Beef Bento

My kids’ all time favorite got to be these piggy ham and cheese sandwiches along with Minions (see picture below)!  These lunch boxes are inspired by The Despicable Me 3 movie that we watched over the summer. The Minions are hard boiled eggs soaked in water and turmeric for the yellow color.  The decorations are cut out seaweeds.  I hope you enjoy today’s bento compilations and lunch box ideas!  If you have any questions, suggestions, or recipe requests, feel free to leave me a comment below. 

Minion and Piggy.

Tools and Ingredients Used for Bento Boxes:
Bento Box 1 (Click here for more information)
Bento Box 2 (Click here for more information)
Hello Kitty Shape Cutter (Click here for more information)
Sandwich Cutters (Click here for more information)
Seaweed (Click here for more information)
Soy Wrappers (Click here for more information)
Bento Picks 1 (Click here for more information)
Bento Picks 2 (Click here for more information)
Bento Picks 3 (Click here for more information)
Food Decorating Tweezers (Click here for more information)
Kitchen Scissors (Click here for more information)
Turmeric (Click here for more information)