Showing posts with label Hong Kong. Show all posts

Saturday, January 27, 2018

How to Make Chinese Steamed Cakes – 2 Ways 傳統雞蛋糕 原味+朱古力味


Ready for Chinese New Year?  This year, Chinese New Year falls on February 16th.  It’ll be the Year of Dog.  To celebrate the occasion, I’ve created this authentic and traditional Chinese dessert that you'll love: Chinese Steamed Cakes – 2 Ways 傳統雞蛋糕 原味+朱古力味!

How to Make Chinese Steamed Cakes - 2 Ways 賀年糕點-傳統雞蛋糕  原味+朱古力味 http://uTry.it

Streamed Cake in Chinese “蒸糕”, resemble the well wished we say during the Chinese New Year. “蒸蒸”日上,步步”高”升 means getting better and better (higher and higher), such as school grades or promotion at work.  Therefore, this is one simple treat that is often prepared during the Chinese New Year.

How to Make Chinese Steamed Cakes - 2 Ways 賀年糕點-傳統雞蛋糕  原味+朱古力味 http://uTry.it

Chinese New Year is one of the biggest festival celebrated in Asia countries.  There are many other treats and dishes that we make during Chinese New Year.  Such as Pot StickersTurnip CakesMatcha CookiesFirecracker ShrimpsGlutinous Rice CakeVegetarian Chop-SueyPork JerkySesame DumplingsHello KittyRed Bean Dumplings, and Osmanthus Jelly, just to name a few.


How to Make Chinese Steamed Cakes - 2 Ways 賀年糕點-傳統雞蛋糕  原味+朱古力味 http://uTry.it


These Chinese Steamed Cakes are super spongy and fluffy.  It's slightly sweet and packed with egg-y flavors.  My kids enjoy the chocolate version a lot (which is not quite traditional).  But I personally adore the original flavors as they bring back so many childhood memories.  It's definitely a nostalgic treat for me!  What are some of your childhood food that you miss?  Share with me in the comment below.  I can't wait to hear from you!


How to Make Chinese Steamed Cakes - 2 Ways 賀年糕點-傳統雞蛋糕  原味+朱古力味 http://uTry.it


Ingredients and Tools Used:
Organic All-Purpose Flour (Click here for more information)
Whisk (Click here for more information)
Measuring Spoons Set (Click here for more information)
Organic Vanilla Extract (Click here for more information)
6 ounces Ramekins (Click here for more information)
Valrhona Cocoa Powder (Click here for more information)
Grapeseed Oil (Click here for more information)
Bamboo Steamers (Click here for more information)
Baking Powder (Click here for more information)
Cupcake Liners (Click here for more information)
Ice Cream Scoop (Click here for more information)


Disclosure: uTry.it is a participant in the Amazon Services LLC Associates Program, an affiliate advertising program designed to provide a means for sites to earn advertising fees by advertising and linking to Amazon.com.


Saturday, August 12, 2017

How to Make Mochi Ice Cream 雪糕糯米糍


Have you ever tried Mochi Ice Cream 雪糕 糯米糍 before?  These little gems are one of my childhood favorites.  They used to be occasional treats when I was young.  Besides it’s considered a little pricey for me when I was a kid, and that there weren’t that many places that sell them back in the good old days!  So, I cherished them whenever I get my hands on these delicious treats!  Fast forward to now, they are more widely available and not as expensive as in the past.

How to Make Ice Cream Mochi 雪糕 糯米糍   http://uTry.it

However, the good news is, I will show you how you can easily make them at home, with the help of my recipe and tutorial!  Best of all, you can create them using your favorite ice cream flavor!  That way, you can enjoy any flavor that your heart desired!  Mochi Ice Cream is a confection made from Japanese Mochi (pounded sticky rice dough) filled with a scoop of ice cream.  They might seems complicated to make, but actually quite simple.  Check out my video tutorial above for more tips and tricks.  There are quite a few steps and chilling time, but all quite straight forward to follow.

How to Make Ice Cream Mochi 雪糕 糯米糍   http://uTry.it

In the mochi dough, I used a mix of glutenous rice flour as well as regular rice flour.  The glutenous rice flour gives this treat the signature chewy texture while the regular rice flour yield the tender and soft texture for the mochi skin, even after freezing! Therefore, it's important to use both type of flours and not just one. With that said, you should always let your Ice Cream Mochi rest at the room temperature for a few minutes before serving.  That way, the mochi skin and the ice cream will have a chance to soften up before you bite into one.

How to Make Ice Cream Mochi 雪糕 糯米糍   http://uTry.it

In today’s Mochi Ice Cream, I filled them with an Easy Mango Ice Cream, which I will also show you how to make in my video, as well as Roasted Strawberry and Matcha Green Tea Ice Cream!  They are all homemade with natural and organic ingredients. Check out the recipe links at the end of the post if you're interested to make your own.  Otherwise, you can use any store bought ice cream as well.   

How to Make Ice Cream Mochi 雪糕 糯米糍   http://uTry.it

Aren't they gorgeous?  I love how beautiful and colorful they turned out.  They make me feel happy just by looking at them, not to mention, they are refreshing and delightful to enjoy in the hot summer days!  Hope you’re enjoying summer in full blast!  If your kiddos are already back to school, these would definitely be their favorite after school snacks!  Thank you so much for stopping by today.  Remember, Eat, Drink, and Be Happy!  Stay tuned for more fun and delicious recipe next week!


Ingredients and Tools Used:
Organic Vanilla Extract  (Click here for more information)
Glutinous Rice Flour (糯米粉) (Click here for more information)

Potato Starch (
粟粉) (Click here for more information)

Freezer Safe Container
 (Click here for more information)

Ninja Blender (Click here for more information)

Ice Cream Machine (Click here for more information)

Tovolo Ice Cream Tub
 (Click here for more information)

Mini Muffin Pan
 (Click here for more information)

Mini Cupcake Liners
 (Click here for more information)

Silpat
 (Click here for more information)

Rolling Pin
 (Click here for more information)

Round Cookie Cutter Set
 (Click here for more information)

Cookie Dough Scoop
 (Click here for more information)

Ice Cream Scoop
 (Click here for more information)

Regular Rice Flour
(粘米粉) (Click here for more information)


Disclosure: uTry.it is a participant in the Amazon Services LLC Associates Program, an affiliate advertising program designed to provide a means for sites to earn advertising fees by advertising and linking to Amazon.com.


Friday, May 26, 2017

Mango Swiss Roll (芒果瑞士卷蛋糕):


Finally, it’s the peak of the mango season!  Fresh Ataulfo Mangoes are simply my favorites.  When they are in season, I often get them in cartons (about 16 to 20 mangoes in a carton).  Not only I enjoy them fresh as is, I also like to create different treats with these refreshing and juicy mangoes. I’ll list some of my other creations at the end of the post if you’re interested.  But today, let me show you how to make this gorgeous Mango Swiss Roll Cake!

How to Make Mango Swiss Roll (芒果瑞士卷蛋糕)  http://uTry.it

My family loves Swiss Roll Cakes!  They are simply a light and fluffy sponge sheet cake, filled with fresh whipped cream, and sometimes fresh fruit, and rolled up into a log.  If you’ve tried my Swiss Roll Cake Recipes in the past, you know my roll cake recipe is pretty much a fail proof one.  It’s easy to roll up without cracks.

You can check out my list of Swiss Roll Recipes here:
Strawberry and Cream Swiss Roll Cake
Decorated Coffee Swiss Roll
Vanilla Swiss Roll Cake
Sakura (Cherry Blossom) Swiss Roll
Chocolate Yule Log
Pumpkin Swiss Roll Cake with Cream Cheese Filling


How to Make Mango Swiss Roll (芒果瑞士卷蛋糕)  http://uTry.it

This Mango Swiss Roll Cake is packed with the delightful and floral mango flavors!  I added fresh mango puree in the cake batter, then filled the cake with diced mangoes and whipped cream, and garnished with more fresh mango roses on top!  It’s looks super gorgeous and it is rather easy to put together if you follow my tips and tricks in the video tutorial! 


How to Make Mango Swiss Roll (芒果瑞士卷蛋糕)  http://uTry.it

I hope you enjoy today’s recipe and tutorial.  If you have any recipe request, feel free to leave me a message below and I’ll try my best to create a tutorial for you. 

How to Make Mango Swiss Roll (芒果瑞士卷蛋糕)  http://uTry.it


Tools and Ingredients Used in this post:
Cake Flour (Click here for more information)
10 x 15-inch Baking Pan (
Click here for more information)
Ninja Blender (
Click here for more information)
Stand Mixer (
Click here for more information)
Cooling Racks (
Click here for more information)
Kerrygold Butter (
Click here for more information)
Organic Vanilla Extract (
Click here for more information)
Mango Extract (
Click here for more information)
Measuring Spoons Set
(Click here for more information)
Powdered Sugar (
here for more information)
Horizon Organic Heavy Whipping Cream (
Click here for more information)
Cream of Tartar (
Click here for more information)
Pastry Bag
(Click here for more information)
Parchment Paper (
Click here for more information)


Other Mango Recipes:
Mango Crêpe Cakes 芒果法式薄餅千層蛋糕

DSC_8167edited

Mango Shaved Ice
316edited

Mango Panna Cotta
DSC_7074edited--watermark

Fresh Mango Salsa

280edited
Fresh Mango Crêpe 芒果法式薄餅
DSC_9251edited

Mango Pudding (芒果布丁)
070edited

Mango Yogurt Popsicles (3 ingredients) 芒果酸乳酪冰棒DSC_1840edited

Coconut Mango Mochi Roll (椰汁香芒糯米卷)
DSC_6151edited


Friday, January 6, 2017

Matcha Cookies with Cranberries and White Chocolate - for Chinese New Year


Happy New Year!  Did you go somewhere fun to count down to the new year?  As usual, we stayed home for the count down and had a wonderful feast along with some bubbly to ring in the new year!  While the vacation and days off might be over for some people, the celebration is still going on in my house.

Matcha Cookies with Cranberries and White Chocolate - for Chinese New Year  http://uTry.it

This year, January 28th marks the first day of the Chinese New Year!  In Asia, Chinese New Year is the biggest celebration of the year, comparable to Christmas and Thanksgiving in the U.S.  It’s a 15 days long celebration!  Schools, most shops, and businesses are closed during the Chinese New Year so that everyone can spend time with the family to celebrate. 

Matcha Cookies with Cranberries and White Chocolate - for Chinese New Year  http://uTry.it

Although we don’t get any days off for Chinese New Year in the States, I try my best to pass down the traditions and culture to my Kids, mostly through story telling, and more often, through food.  There are many traditional food and special dishes that we prepare mainly for the Chinese New Year.  But some are so good that I pretty much make them all year round, such as these Matcha (Japanese Green Tea) Cookies with Cranberries and White Chocolate.

Matcha Cookies with Cranberries and White Chocolate - for Chinese New Year  http://uTry.it

These cookies are quite simple to prepare.  They are the “slice and bake” type of cookie which you can (and should) prepare the dough ahead of time.  When it comes time to bake, you simply slice the cookie dough into disks and bake them off.  If you haven’t done so, watch my video above to check out my secret/tip on how to keep the cookie dough nice and round instead of having a “flat bottom” while it’s chilling in the fridge.  And you’re very welcomed!  Consider this tip as my Chinese New Year gift to you!  

Matcha Cookies with Cranberries and White Chocolate - for Chinese New Year  http://uTry.it

If you like Matcha, you’re going to love these cookies.  They are packed with the matcha flavor and go nicely with a cup of hot tea.  However, Matcha could be an acquire taste for some people though. 

Matcha Cookies with Cranberries and White Chocolate - for Chinese New Year  http://uTry.it

These matcha cookies are not too sweet, therefore, the white chocolate chips add a nice touch of sweetness to balance out the flavors.  The dried cranberries not only add a nice contrast of color to the cookies, but also a little tartness and texture as well. 

Matcha Cookies with Cranberries and White Chocolate - for Chinese New Year  http://uTry.it

Make a batch to share with your friends and family during this Chinese New Year.  I’m sure they’ll love these gorgeous and fun cookies.  What other family traditions do you celebrate?  Do you have any special Chinese New Year dishes that you would always prepare for your family?  Leave a comment below and let me know.  I can’t wait to hear from you!


Matcha Cookies with Cranberries and White Chocolate - for Chinese New Year  http://uTry.it


Ingredients and Tools used:
Matcha Powder (Click here for more information)
Dried Cranberries (Click here for more information)
White Chocolate Chips (
Click here for more information)
Cooling Racks (
Click here for more information)
Baking Sheets (
Click here for more information)
Silpat (
Click here for more information)
Rolling Pin (
Click here for more information)
 

Friday, August 5, 2016

Chocolate Bubble Waffle (Eggette) Cone Ice Cream 朱古力雞蛋仔雪糕


Have you seen this Bubble Waffle Cone Ice Cream before?  I’m sure most of you had by now.  If not, you're in a treat today!  Apparently, it’s one of the latest food trend!  However, the bubble waffle itself  (Eggette 雞蛋仔) is no stranger to me!  It’s one of my favorite childhood street food from Hong Kong!  You can click here to check out my recipe and video tutorial on how to make the original/traditional version.

Chocolate Bubble Waffle (Eggette) Cone Ice Cream 朱古力雞蛋仔雪糕  http://uTry.it

Today, I want to share the recipe of a chocolate version of the bubble waffle with you.  They are delicious on their own, crispy on the outside and tender on the inside.  I used my favorite Valrhona cocoa powder for the waffle batter, so that they are packed with wonderfully deep, dark chocolate flavor.  After making the bubble waffle, I shape it into a cone shape while it’s still warm, by placing it into a cone shape wire rack (to hold its shape.)  The bubble waffle will turn crispy once it’s completely cooled.  I love this wire rack not only because of its shape, I am also re-using it as a serving rack for this dessert dish as well.  Not to mention that this rack was meant to be a french fries holder to begin with!  Hey, I love my kitchen tools that can multi-task!  I’ll list the information of this cone shape wire rack and other tools/ingredients that I used at the bottom of this post for your reference.

Chocolate Bubble Waffle (Eggette) Cone Ice Cream 朱古力雞蛋仔雪糕  http://uTry.it

As you can see from my video and pictures, I filled the waffle cone with chocolate ice cream, freshly whipped cream, chocolate sauce, sprinkles, a cherry, Pocky sticks and a mini chocolate cupcake!  It’s a mouthful just to list the ingredients, however the taste of this chocolate overload is surely wonderful and out of this world delicious!  Without a doubt, it’s a glorious and outrageous dessert to make and enjoy!  Seriously, outrageously good! 

Chocolate Bubble Waffle (Eggette) Cone Ice Cream 朱古力雞蛋仔雪糕  http://uTry.it

My Kids had so much fun sharing this treat together on a hot summer afternoon!  As you can see, they couldn’t wait any longer to devour this monster dessert down while I was still taking pictures!  It was that good!  Make someone happy, and make this treat for them!  I’m sure they’ll love it as much as we did!  What is your favorite treat during the hot summer days?  Ice cream definitely top our list!  Please share yours in the comment below.  I can’t wait to hear from you!  Take care and stay tuned for another wonderful recipe coming next week!

Tools and ingredients:
Bubble Egg Waffle Pan (Click here for more information)
Electric Bubble Waffle Maker (Click here for more information)
Cone Shape Wire Rack (Click here for more information)
Valrhona Cocoa Powder (Click here for more information)
Grapeseed Oil  (Click here for more information)
Custard Powder (Click here for more information)
Tapioca Flour (Click here for more information)
Evaporated Milk (Click here for more information)
Organic Vanilla Extract (Click here for more information)
Maraschino cherries (Click here for more information)
Cooling Racks (Click here for more information)
Chocolate Pocky (Clickhere for more information)
Plain Pocky (Clickhere for more information)


Friday, July 8, 2016

Hello Kitty Rice with Tomato and Egg Stir Fry 吉蒂貓飯配蕃茄炒蛋


Can’t believe we’re stepping into the month of July already!  Despite the soaring hot temperature in Southern California, July also means celebrating birthdays in our family.  There are a couple of birthdays happening this month and one of them is my Baby Girl’s.  

How to Make Hello Kitty Rice with Tomato and Egg Stir Fry 吉蒂貓飯配蕃茄炒蛋  with step-by-step video tutorial http://uTry.it

The Birthday Girl gets to pick her favorite birthday cake and this one is her choice for this year.  It’s perfect for birthday celebration during the summer because it’s a gorgeous "no-bake" cake.  Like Mother like Daughter, you have very good taste, Baby!  For this special occasion, Mommy is also making Baby Girl’s favorite dish, Tomato and Egg Stir Fry (蕃茄炒蛋).  It’s a very refreshing and appetizing dish to enjoy especially in the summer months.  This dish is slightly sweet, a little bit tart, and perfectly savory at the same time.  Like most Asian recipes, this dish has a well balanced flavors.  It’s a very popular everyday homemade dish from Hong Kong.  As you can see, I didn’t just stop there, I paired it with the super adorable Hello Kitty Rice, another favorite of my Little Girl.  Although Mommy herself is not really a Hello Kitty fan, she did enjoy making this dish as she knows how much the Birthday Girl loves it.  I am secretly wishing the boys in the house are as easy to please as Baby Girl does! Shhh….   

How to Make Hello Kitty Rice with Tomato and Egg Stir Fry 吉蒂貓飯配蕃茄炒蛋  with step-by-step video tutorial http://uTry.it

If you haven’t done so, remember to check out the YouTube video tutorial with step-by-step instruction on how to prepare this dish (the link is at the top of this post).  It’s easier to make than it looks, especially the shaped rice.  Best of all, you don’t need any mold or special equipment to make it, except for a pair of kitchen scissors and a few minutes of your time, and your love of course.  If you have a Hello Kitty fan in your house like I do, you’ve got to check this out! Everything is edible in this dish, all natural and really healthy as well.  You can also make this dish with your kids together.  My Baby Girl always enjoy creating fun dishes with me in the kitchen and this is definitely one of her favorite ones to make.    

How to Make Hello Kitty Rice with Tomato and Egg Stir Fry 吉蒂貓飯配蕃茄炒蛋  with step-by-step video tutorial http://uTry.it

I hope you enjoy today’s recipe and tutorial.  Stay tuned for more fun and easy recipe next week.  Don’t forget to subscribe to my YouTube channel here.  That way, you won’t miss out on any video and you’ll be the first to know when I have a new tutorial published.

Tools and Ingredients used:
Nori (seaweed): (
Click here for more information)
Whole Kernel Corn: (Click here for more information)
Corn starch: (Click here for more information)
Serrated Knife for cutting tomato: (Click here for more information)
Vegetable oil: (Click here for more information)
Zojirushi Rice Cooker: (Click here for more information)
Japanese Short Grain Rice: (Click here for more information)
Food Decorating Tongs/Tweezers: (Click here for more information)
Hello Kitty Cupcake Plush: (Click here for more information)
Hello Kitty Flatware Set: (Click here for more information)
 

Friday, April 8, 2016

Classic Vanilla Swiss Roll Cake (雲呢拿瑞士卷蛋糕)


If you’ve been following my blog for a while, I’m sure you know I’ve created my fair share of Swiss Roll Cakes.  So far, I’ve shared the recipes of Strawberry and Cream, Decorated Coffee, Yule Log, and Sakura, etc.  Today, we’re going back to basic.  Check out this Classic Vanilla Swiss Roll Cake (瑞士卷蛋糕) and the tutorial video above.


How to Make Vanilla Bean Swiss Roll (雲呢拿瑞士卷蛋糕)  with Step-by-step video tutorial.  Easy and foolproof Swiss Roll recipe.  http://uTry.it

All along, I thought my family is chocoholic!  The darker, the better!  However, since the day that I’ve made this Vanilla Swiss Roll, they’ve been asking me to make this cake, over and over again!  Seems like they’ve forgotten the chocolate option for this cake, which used to be their favorite! 


How to Make Vanilla Bean Swiss Roll (雲呢拿瑞士卷蛋糕)  with Step-by-step video tutorial.  Easy and foolproof Swiss Roll recipe.  http://uTry.it

There’s something about this basic vanilla cake that we all love.  I guess it’s just the simplicity that wins us over.  It’s made out of just a few basic ingredients that you probably have already in your pantry.  And you can simply taste each one of them, such as the sweet and slightly floral vanilla aroma, the rich and decadent egg flavor, and the silky and smooth freshly whipped cream, etc. 


How to Make Vanilla Bean Swiss Roll (雲呢拿瑞士卷蛋糕)  with Step-by-step video tutorial.  Easy and foolproof Swiss Roll recipe.  http://uTry.it

If you haven’t try any of my Swiss Roll recipe just yet, I’m sure this is the time to do so.  It’s basically a foolproof Swiss Roll Cake recipe that assures you the ease of rolling up your cake nice and easy without any cracks.  The cake texture is light and silky smooth.  Each bite melts in your mouth in heavenly goodness!  I wish I can share this cake with you by passing a slice through the monitor.      


How to Make Vanilla Bean Swiss Roll (雲呢拿瑞士卷蛋糕)  with Step-by-step video tutorial.  Easy and foolproof Swiss Roll recipe.  http://uTry.it

Give this recipe a try, I’m sure it’ll become your family’s favorite as well.  If you haven’t done so, please subscribe to my Youtube channel here.  That way, you won’t miss out on any video and you’ll be the first to know when I have a new tutorial published.  Thank you for stopping by today. Please stay tuned for more fun and easy recipe.  If you have any recipe request, simply leave a comment below and I’ll try by best to post them soon!      

How to Make Vanilla Bean Swiss Roll (雲呢拿瑞士卷蛋糕)  with Step-by-step video tutorial.  Easy and foolproof Swiss Roll recipe.  http://uTry.it


Tools and ingredient used:

10X15 Baking pan (Click here for more information)
Vanilla Bean Paste (Click here for more information)
Organic Heavy Cream (Click here for more information)


Saturday, February 20, 2016

Sakura (Cherry Blossom) Swiss Roll 櫻花瑞士卷蛋糕


I adore Sakura (Cherry Blossom)!  One of my dreams is to visit Japan in Spring to enjoy the scenery when the Sakura blooms!  Since I don’t think that is going to happen any time soon, enjoying a slice of this Sakura Swiss Roll Cake 櫻花瑞士卷蛋糕 is as close as I can get my hands (or taste buds) on them!  

Check out how to make this gorgeous Sakura (Cherry Blossom) Swiss Roll 櫻花瑞士卷蛋糕 with step-by-step video tutorial!

If you’ve tried my other Swiss Roll recipes, such as this Decorated Coffee Swiss Roll, Strawberry and Cream Swiss Roll, or Chocolate Yule Log, you probably know that my roll cake recipes are pretty much fool proof.  What is the biggest nightmare when making a roll cake?  I’m sure any baker would tell you that having a cracked up cake when you try to roll it up is the baker's biggest fear!  So, give my recipes a try and you’ll be amazed by how soft and spongy the cake is, which makes it super easy to roll up!  Watch the YouTube video tutorial at the top of this post and you’ll see what I meant.  

Check out how to make this gorgeous Sakura (Cherry Blossom) Swiss Roll 櫻花瑞士卷蛋糕 with step-by-step video tutorial!

I used some pickled sakura to decorate this cake.  Beside adding a little pattern and decorations on the cake, the pickled sakura also adding a hints of tartness and unique flavors to this cake (the flavor is similar to the Chinese sweet and sour plums).  I also added some sakura paste into the cake batter and fillings.  It’s tart and sweet at the same time, and packed with wonderful sakura flavor which I adore.  The subtle floral aroma is beautiful in this gorgeous cake.  Check out the list of tools and ingredients at the end of this post to find out where to get them.  I hope you’ll give this cake a try soon.  It sure feels like Spring time arrived early in my kitchen!

Check out how to make this gorgeous Sakura (Cherry Blossom) Swiss Roll 櫻花瑞士卷蛋糕 with step-by-step video tutorial!


Pickled Sakora Cherry Blossoms (Click here for more information)
Sakura Paste (Click here for more information)
10 by 15-inch Baking Pan (Click here for more information)
Heavy Cream (Click here for more information)
Stand Mixer (Click here for more information)
Cooling Rack (Click here for more information)
Vanilla Extract (Click here for more information)


Friday, August 21, 2015

Black Sesame Dumplings with Ginger Syrup 薑茶芝麻湯丸


Check out this video tutorial on how to make this authentic Black Sesame Dumplings with Ginger Syrup 薑茶芝麻湯丸  http://uTry.it


This year, the Chinese Mid-Autumn Festival (中秋節) falls on September 27.  I know it’s still more than a month away.  But there are several traditional treats and desserts that I wanted to share with you.  So, I guess I better get started early!  To read more about this festival and the traditional Moon Cake, you can click here to read my previous post.   Besides the traditional Moon Cake that we eat to celebrate, this dumplings dessert (湯丸) is another must have for this festival.  It’s because the round shape of these dumplings that represent the whole of the family.  After all, it’s a festival to celebrate family and love.

Check out this video tutorial on how to make this authentic Black Sesame Dumplings with Ginger Syrup 薑茶芝麻湯丸  http://uTry.it


In this recipe, I used the most popular fillings for this dumpling, black sesame.  Well, at least that’s the most popular filling among my family.  Some people like to fill these dumplings with read bean paste, peanut butter, brown sugar pieces, etc.  Well, that would be for another post.  I took a short cut and use black sesame powder for the fillings.  But you can also grind your own from whole toasted sesame seeds if you like. I also paired these dumplings with the traditional ginger syrup (薑茶).  The ginger syrup is only slightly sweeten and packed with fresh ginger aroma.  I also added a little bit of osmanthus 桂花 to enhance the flavor.  It adds a touch of floral sweetness without additional sugar.  But that’s totally optional.  I’ll list the ingredients on the bottom of this post for your reference.


Check out this video tutorial on how to make this authentic Black Sesame Dumplings with Ginger Syrup 薑茶芝麻湯丸  http://uTry.it

Ready to see how I made these?  Check out my video tutorial below.


I hope you enjoyed watching my video tutorial.  If you haven’t done so, please subscribe to my YouTube channel here.  You’ll be the first to know when I have new video tutorials published. 

If you’re interested, click here check out these Mid-Autumn Macarons that I shared last year.   Oh, and click here to check out those Snow Skin Mooncake as well.


Check out this video tutorial on how to make this authentic Black Sesame Dumplings with Ginger Syrup 薑茶芝麻湯丸  http://uTry.it


Ingredients and props for this post:
Glutinous Rice Flour (click here for more information)
Black Sesame Powder (click here for more information)
Osmanthus 桂花 (click here for more information)
Cane Sugar 片糖 (click here for more information)
Curled Handle Ceramic Spoon (Click here to see product information)
Bamboo Placemats (Click here for more information)


Wednesday, July 29, 2015

Hong Kong Style Eggettes - Bubble Waffle (香港街頭小吃: 雞蛋仔)


Come learn how to make these Hong Kong Sytle Eggettes (雞蛋仔), a very popular street food in Hong Kong.  http://uTry.it
 
If you’re from, or have visited, Hong Kong in the past, I’m sure you’re familiar with these Hong Kong Style Eggettes (雞蛋仔).  They are one popular street food originated in Kong Kong.  I grew up eating a lot of them as after school snacks.  It’s definitely another nostalgic treat for me besides these.  Eggettes (雞蛋仔) are typically made with a batter consists of flour, eggs, sugar, water and evaporated milk.


Come learn how to make these Hong Kong Sytle Eggettes (雞蛋仔), a very popular street food in Hong Kong.  http://uTry.it

The batter is then cooked in a special iron eggette plates (as shown in the picture below) over the stove top.  My Dad got me this eggette pan when he travelled to Hong Kong last year.  Good news is, you can also get one from the States, I’ll put up a link at the end of this post for your reference.  
There are many flavor variations of eggettes these days including chocolate, green tea, or even filled with mochi (sticky rice balls).  Today, I’m going to share with you the originally flavor before moving on to more exotic ones.  When you buy these eggette in Hong Kong, they are usually put in a brown paper bag, perfect as a snack on the go.  While I was searching for something to hold these eggette for the photo shoot, my Baby Girl suggested that I use these pink paper cups (see picture above) to hold the eggette.  I say, she had a pretty good sense of food styling, just like Mama.      

 
Come learn how to make these Hong Kong Sytle Eggettes (雞蛋仔), a very popular street food in Hong Kong.  http://uTry.it
 

Check out the video below on how to make them.


I hope you enjoyed watching my video tutorial.  If you haven’t done so, please subscribe to my YouTube channel here.  You’ll be the first to know when I have new video tutorials published. 


Come learn how to make these Hong Kong Sytle Eggettes (雞蛋仔), a very popular street food in Hong Kong.  http://uTry.it
 
 
These eggetees are crunchy on the outside with crispy edges (my favorite parts) along with a soft and tender interior texture.  It’s packed with wonderful egg and custard flavors.  They are slightly sweet with a hint of vanilla aroma.  I say, they are perfect with a cup of Boba Milk Tea!  Please check out my list below as a reference on where to buy the equipment and ingredients.   If you have any questions, feel free to leave me a message below.  Thank you for stopping by today and I hope you’ll give this fun recipe a try soon.  Have fun cooking!
 

P.S.  I've found this electric bubble waffle maker online (Click here for more information).  Although it's not the one I use in this post.  But I think it's pretty convenience as you don't have to stand around the stove top to make these.
 
Ingredients and equipment used in this post:

Bubble Egg Waffle Pan (Click here for similar product)
Electric Bubble Waffle Maker (Click here for more information)
Tapioca Flour (Click here for more information)
Custard Powder (Click here for more information)
Evaporated milk (Click here for more information)
Grapeseed Oil (Click here for more information)
Pink Paper Baking Cups (Click here for similar product)
Bamboo Placemats (Click here for more information)


Wednesday, July 22, 2015

Hello Kitty 中菜軒 Restaurant Review


Hello Kitty 中菜軒 Restaurant Review   http://uTry.it

If you’re following me on Instagram, you might have noticed that I recently visited Hong Kong and Shanghai with my family.  It was quite a challenge to visit HKG in the summer as the high humidity really elevated the summer heat that my family is so NOT used to.  Anyway, we still had a blast visiting family and friends, plus exploring new places and food.  We also planned a surprise lunch for our Little Girl to the Hello Kitty Restaurant (Hello Kitty 中菜軒) during our visit in HKG.  And we also invited our Niece to join since she’s also a big Hello Kitty fan! 
Hello Kitty 中菜軒 Restaurant Review   http://uTry.it

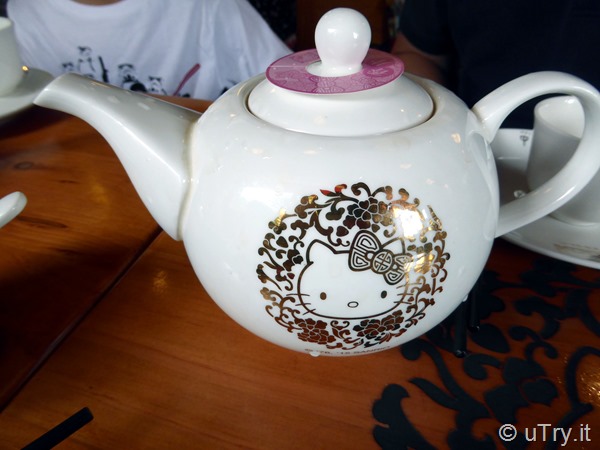
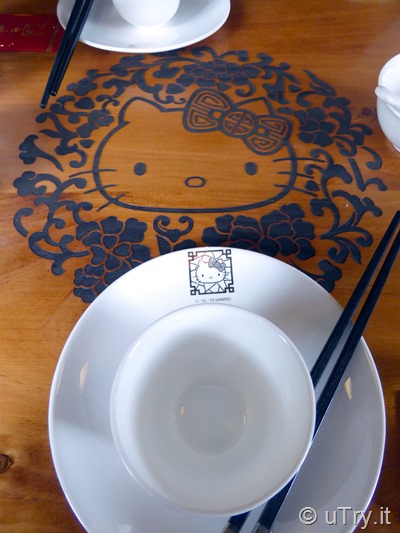
It’s a super cute restaurant with all the Hello Kitty décor that you can think of!  From the tea pot, to the serving plate!  We ordered a pot of jasmine tea to start the meal and the tea was fragrant with a beautiful floral aroma.
Hello Kitty 中菜軒 Restaurant Review   http://uTry.it

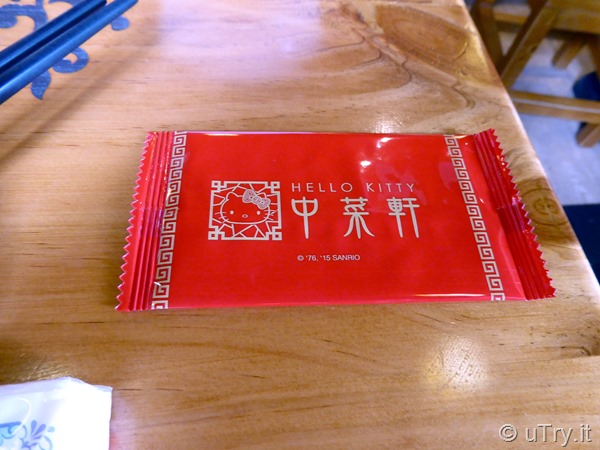
Even the wet napkins were package with the infamous Hello Kitty logo.
Hello Kitty 中菜軒 Restaurant Review   http://uTry.it

I love this ceiling light (see picture below)!  So adorable and I don’t mind to have it hanging in my living room, at all (given that I am not really a Hello Kitty fan myself)!

Hello Kitty 中菜軒 Restaurant Review   http://uTry.it

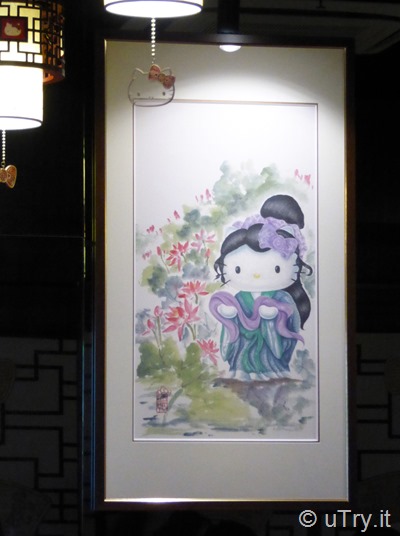
The restaurant itself was not too big, probably there were less than 20 small tables or so all together, along with a private dining room.  The picture below was one of the décor inside that room.

Hello Kitty 中菜軒 Restaurant Review   http://uTry.it

Let’s move on to the food we had, shall we?  We came here for Hello Kitty, so, we ordered most of the items that had the shape of Kitty.  Please keep in mind, not all of the items on the menu came with the image or shape of Kitty.  You can click here to see the restaurant menu.  Only those with pictures shown on the menu came with the Kitty (or the bow) shapes.  The rest are just regular Dim Sum or dishes that you can find in most Chinese restaurants. 

Hello Kitty 中菜軒 Restaurant Review   http://uTry.it

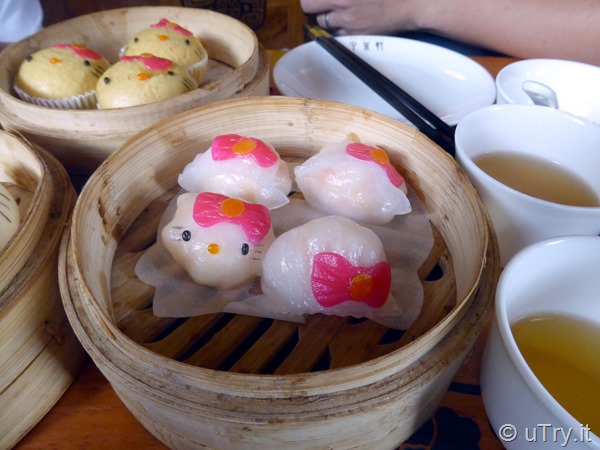
Here are the close up of each item that we tried.  The picture below is the Shrimp Dumplings (Hello Kitty 蝦餃皇).  Yes, only one out of the four dumplings really came with the Hello Kitty face, the rest are just decorated with the bow.  Taste wise, it is okay, or I rated it acceptable.  Definitely not the best Shrimp Dumplings in town.  But the most important thing is that the little girls were so excited and happy with the food!
Hello Kitty 中菜軒 Restaurant Review   http://uTry.it

Up next, it’s the Lava Custard Buns (Hello Kitty 流沙包).  The taste was good, but the bun to filling racial was a bit off.  I was expecting a little bit more filling than what they had.

Hello Kitty 中菜軒 Restaurant Review   http://uTry.it

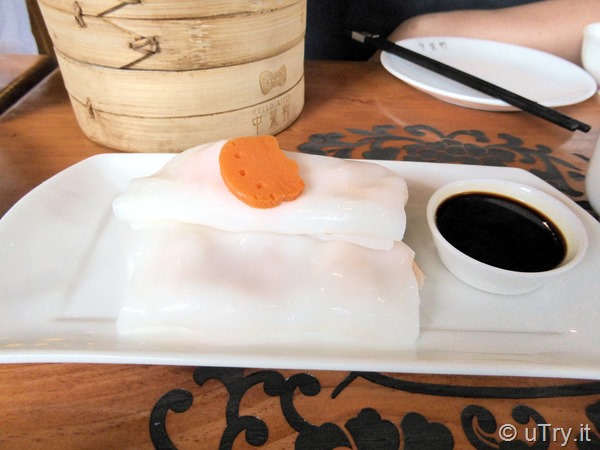
Up next was Shrimp Wrapped with Rice Noodle (鮮蝦仁腸).  It’s a popular Dim Sum dish served with light soy sauce.  This is my Boy’s favorite dish.  I did not get to tast it as the kids finished them in no time!
Hello Kitty 中菜軒 Restaurant Review   http://uTry.it

The picture below is the Steamed Chinese Sponge Cake (Hello Kitty 馬拉糕).  The taste and texture was alright.  Again, there’s room for improvement in the taste and texture aspect, but they are simply adorable to look at. 

Hello Kitty 中菜軒 Restaurant Review   http://uTry.it


We also tried the Deep Fried Sticky Dumpling (Hello Kitty 蝴蝶角).  It’s in the shapes of the Hello Kitty Bow.  Inside was minced meat wrapped with sticky rice dough and then deep fried.  Taste was good, but it has less fillings compared to most restaurant with the same dish.  I give it the benefit of the doubt since it’s not in the traditional oval (or American Football) shape that can hold a lot more fillings than the bow shape. 

Hello Kitty 中菜軒 Restaurant Review   http://uTry.it

We also ordered some stir fried broccoli but didn’t take a picture of it because there’s no Kitty image on it.  Last but not least, the main dish we had was Shrimp with Egg Whites over Rice (Hello Kitty 翡翠蝦球蛋白飯).  The light green layer on the bottom was the steamed egg whites.  The shrimps were fresh and bouncy and the seasoning was right.  It’s a cute dish, but the steamed rice didn’t taste that fresh.  Not sure if it was due to molding the Kitty shape in advance that caused it? 

Hello Kitty 中菜軒 Restaurant Review   http://uTry.it

Over all, if you’re aiming for good Dim Sum and Chinese dishes, this may not be the restaurant that you want to pick especially with the prices that they’re charging.  However, if you have little Hello Kitty fans in your family, they will for sure enjoy this place a lot as they get all the Hello Kitty fixing that they can get in a meal!  I was glad that I took my Girl and my Niece there for lunch!  The excitement and smiles on their little faces make everything worthwhile!

Hello Kitty 中菜軒 Restaurant Review   http://uTry.it


More information for this restaurant:
Click here to the restaurant’s website for menu, address and phone number.

Restaurant Review Disclaimer: uTry.it restaurant reviews are solely based on our experience at each restaurant we visit.   They were just our opinions.  uTry.it and its owner were not compensated in any way to dine at these restaurants nor to write reviews.