Showing posts with label Party. Show all posts

Monday, November 18, 2019

How to Make Holiday Individual Turkey Pot Pie


Disclaimer: This post was sponsored by Better Than Bouillon as part of an Influencer Activation for Influence Central and all opinions expressed in my post are my own.  For more recipes and inspirations, please visit: http://goic.io/GpuqMV


My family loves the holiday season when we get to gather around the dinner table to share our favorite dishes and recipes.  When I host holiday gatherings at my place, I always prepare a main dish while my family and friends would bring appetizers and side dishes to share.  It's always wonderful to share and create memories with my family through food!  If you can't tell by now, everyone in my family are foodies!  I guess you can say that the apples don't fall far from the tree!  This year, I'll be sharing these amazing Holiday Individual Turkey Pot Pies with my friends and family!


If you haven't done so, be sure to check out my video tutorial above.  This recipe is so much fun and so easy to make, yet its super festive and scrumptious!  Best of all, you can prepare them a day in advance.  Simply prepared the pies (without the egg wash), covered, and keep them in the fridge until ready to bake.  On the day of the party, simply brush the egg wash on the pastry and pop them in the oven before your guests arrive.  This way, you can join in and enjoy the party, too!  As much as I enjoy a holiday feast, I don't think anyone should, or wanted to, slave inside the kitchen for the holidays!  This recipe is a perfect solution for you if you are hosting a gathering for your friends and family this holiday season!  Think of how easy it will be for the upcoming Thanksgiving, Friendsgiving, Christmas, or New Years' parties!   


The flavors of these Holiday Turkey Pot Pies are so amazing that your guests would think that you've spent hours in the kitchen preparing them!  Thanks to the Better Than Bouillon Turkey Base, it adds a depth of flavor in the turkey pie fillings in a cinch.  It truly elevates and transforms the flavors of your ingredients.  You would feel like you're enjoying a traditional slow roasted turkey, but in a pie form, which is a lot more fun to eat than just a traditional roasted turkey (sorry Mr. Turkey!)  Rather than the traditional bouillon cube, the Better Than Bouillon Turkey Base is a paste, which makes it a lot easier to incorporate with the ingredients because you don't have to wait for the cube to dissolve.  The flavor is so concentrated that it won't dilute your sauce at all!  It's truly a flavor bomb, in my opinion!


I'd been using Better Than Bouillon for many years now and always have them on hand.  Besides the Turkey Base, my favorites are Roasted Beef Base and Roasted Chicken Base.  I make my family's favorite beef stew at least once a week and Better Than Bouillon Roasted Beef Base is the secret ingredient that make it tastes so amazing!  Better Than Bouillon Roasted Beef Base intensifies the beefy flavors in the stew without diluting the sauce.  I also use it create a soup base, to build flavor in my sauces, to make a quick beef au jus for roasted beef, and to create gravy with it as well.  Also, you can substitute the turkey meat in this recipe with chicken (and swap in the Roasted Chicken Base) to make chicken pot pies.  And I promise, they will be the best chicken pot pie you'll ever had!  They are so good that my kids always wonder if I ordered and pick up the Chicken Pot Pies from the restaurant!  There are so many different flavors of Better Than Bouillon to explore, such as the Seasoned Vegetable Base, Roasted Garlic Base (perfect for making garlic bread), and Mushroom Base, & etc. Be sure to grab a few on your next grocery run to take your holiday recipes to the next level and make your life a whole lot easier and flavorful!  You can use the product locator on the Better Than Bouillon site or order online to get those hard to find flavors as well! 

For more product information, please visit:


Back to these Holiday Individual Turkey Pot Pies!  Imagine buttery and flaky pie crust, fresh mixed vegetables, and tender turkey meat surrounded by creamy and velvety sauce that has a "cooked all day" flavors, thanks to the Better Than Bouillon Turkey Base. This decadent turkey pot pie is served with sweet and tart cranberry sauce for a contrast of flavors!  Each bit is simply heavenly!   You'll definitely be making this recipe again and again!  What are your family's holiday traditions?  Do you have a family's favorite recipe?  Have you tried Better Than Bouillon products before?  If so, which one is your favorite?  Be sure to leave a commend below and share with me.  Can't wait to hear from you!  Happy Holidays, from my kitchen to yours!


Please follow Better Than Bouillon on other Social Media:

For more recipes and inspirations, please visit: http://goic.io/GpuqMV

Better Than Bouillon Facebook: https://www.facebook.com/BetterThanBouillon/
Better Than Bouillon Instagram: https://www.instagram.com/betterthanbouillon/
Better Than Bouillon Twitter: https://twitter.com/btbouillon
Better Than Bouillon Pinterest: https://www.pinterest.com/BTBouillon/


#HolidaysWithBTB #BTBHolidayRecipes #IC #ad


Holiday Individual Turkey Pot Pie Recipe
Makes: 6 (8 ounces Pies)

4 tablespoons butter
1 yellow onion, diced
1 cup pumpkin (frozen, diced)
1 cup mixed vegetables (frozen)
4 cups roasted turkey (diced)
1 tablespoon sage (chiffonade)
1 teaspoon thyme
1/3 cup all-purpose flour (plus more for rolling puff pastry)
2 tablespoons Better Than Bouillon Turkey Base
2 cups turkey stock (low sodium)
3/4 cup heavy cream
2 sheets puff pastry (thawed)
1 egg yolk
1 tablespoon water
Cranberry Sauce (for serving)
Fresh Cranberries and Sage leaves (optional, for garnish)

Preheat the oven to 425°F.  In a large pot, melt butter over medium heat.  Stir in onions and cook until translucent, about 3 to 4 minutes.
Add in pumpkin, mixed vegetables, turkey, sage, and thyme.  Sprinkle the flour over the ingredients,  stir gently, and let the flour cook for 1 minute.  Add in the Better Than Bouillon Turkey Base and turkey stock.  Let the sauce cook until thickened, about 3 minutes.  Remove from heat and stir in the heavy cream.  Let the fillings cool off slight while you prepare the puff pastry.

Gently roll out the seams of the puff pastry on a lightly flour-dusted surface.  Place your ramekins up-side-down on the pastry as a guide.  Cut out 3 pastry per puff pastry sheet.  Repeat with the remaining puff pastry sheet.

Evenly divide the turkey fillings into the 6 ramekins.  Top each one with a cut out puff pastry.  Place the filled ramekins onto a foil lined baking sheet.  Whisk the egg yolk and water to create an egg wash.  Brush a think layer of egg wash onto each puff pastry.

Bake for 22 to 25 minutes, or until the puff pastry is golden brown and cooked through.

Let cool slightly before serving.  Be very careful, fillings is extremely hot.  Garnish with cranberry and sage (if using.)  Serve these Holiday Turkey Pot Pies with cranberry sauce and enjoy!


Friday, December 8, 2017

How to Fold Christmas Tree Napkins – A Festive Holiday Tablescape and Place Card Idea


Are you ready for the holiday?  If you’re hosting a Christmas party this year, I have a wonderful tablescape and place card idea for you.  I promise, it’s quick, easy, and festive!  After all, we don’t want to spend all day fixing/setting the table while we have a feast to prepare, don't we?  On a side note, my kids are into origami (art of paper folding) and therefore they totally enjoyed folding these Christmas Tree Napkins.  So, you might want to put your little helpers to work as well!  Yes, it’s so easy that kids can do it too!

How to Fold Christmas Tree Napkins – A Festive Holiday Tablescape and Place Card Idea   http://uTry.it

See how festive this table setting is?  In addition to the visual, I wish you can smell it too.  Because I added a cinnamon stick to mimic the tree trunk and the whole plate simply smells wonderful.  I think cinnamon is one of my favorite aroma for the holidays!  It’s warm and earthy.  I feel so relax and calm sniffing it in!   

How to Fold Christmas Tree Napkins – A Festive Holiday Tablescape and Place Card Idea   http://uTry.it

I tied a little bow tie with Christmas colored ribbon on the cinnamon stick (or you can use kitchen twine as well) so that your guest can take it home and hang it on their Christmas tree after the party!
  
How to Fold Christmas Tree Napkins – A Festive Holiday Tablescape and Place Card Idea   http://uTry.it

The step-by-step pictorial above give you an idea of the steps.  But since I created a video tutorial for you, I think it’s even easier to just watch the video and follow along.  Have fun with this little project! And below are the materials you’ll need for this Christmas Tree Napkin!  Stay tuned for more festive recipe next week!


Christmas Tree Napkins:
Makes: 1 tables setting (simply multiply with number of guests/settings needed)

1 square green napkin  (
Click here for more information)
1 cinnamon stick (
Click here for more information)
1 (12-inch) long ribbon or kitchen twine (
Click here for more information)
1 Gold star sticker (
Click here for more information)
1 Christmas Berries sticker (
Click here for more information)
1 small holiday post-it (
Click here for more information)
Green Handle Flatware (Click here for more information)
White Dinner Plates (Click here for more information)
Silver Charger (Click here for more information)


Disclosure: uTry.it is a participant in the Amazon Services LLC Associates Program, an affiliate advertising program designed to provide a means for sites to earn advertising fees by advertising and linking to Amazon.com.


Thursday, November 16, 2017

How to Make Vanilla Dream Mille Crêpe Cake (香草千層可麗餅蛋糕)


Holidays are fast approaching!  How do you celebrate?  I truly enjoy spending time with friends and family around the dinner table to create more memories. 


How to Make Vanilla Dream Mille Crêpe Cake  http://uTry.it

This gorgeous and scrumptious Vanilla Dream Mille Crêpe Cake would be the perfect sweet ending to your holiday meals!  It consists layers and layers of French Crêpes, alternate with a layer of Vanilla Mascarpone Cream Filling.  It’s decadent, yet not too sweet. 

How to Make Vanilla Dream Mille Crêpe Cake  http://uTry.it


The cake itself is truly delicious.  This recipe featured Singing Dog Vanilla’s Organic Vanilla Extract in both the Crêpe batter and the Raspberry Sauce.  I used Singing Dog Vanilla’s Vanilla Bean Paste in the Mascarpone Cream fillings in between the Crêpe layers.  This cake is packed with floral and sweet vanilla aromas and you can see the vanilla specks throughout the cream fillings.  The texture is silky soft and tender.  I like to drizzle a little bit of homemade raspberry sauce on top for a festive and refreshing taste.

How to Make Vanilla Dream Mille Crêpe Cake  http://uTry.it

If you’re still searching for a dessert to share with your loved ones, look no further!  I’m sure your friends and family will love this cake!

How to Make Vanilla Dream Mille Crêpe Cake  http://uTry.it


Click here for the recipe: https://goo.gl/ww9PYa


Tools and Ingredients Used:
Singing Dog Vanilla's Organic Vanilla Extract (Click here for more information)Singing Dog Vanilla's Vanilla Bean Paste (Click here for more information)
Crêpe Pan (Click here for more information)

Crêpe Spreader (Click here for more information)

Electric Crêpe Maker (with spreader) (Click here for more information)

Lazy Susan (Click here for more information)

Ninja Blender (Click here for more information)

Irish Salted Butter (Click here for more information)

Pastry Bag and Star Tip set (Click here for more information)

Offset Spatula (Click here for more information)

Heat Proof Egg Turner (Click here for more information)


Disclosure: uTry.it is a participant in the Amazon Services LLC Associates Program, an affiliate advertising program designed to provide a means for sites to earn advertising fees by advertising and linking to Amazon.com.

Disclaimer: This video is brought to you by Singing Dog Vanilla.  All messages and opinions are 100% my own. 


Friday, October 20, 2017

How to Make Creepy Eyeballs Halloween Brew – Kids Friendly Party Recipe 鬼異眼球萬聖節特飲


Will you be hosting a Halloween party this year?  If you do, you’ve got to check out this Creepy Eyeballs Halloween Brew Recipe 鬼異眼球萬聖節特飲!  When I tested out this recipe with my kids, they were so excited and had so much fun with it!  Yes, this is a kids friendly recipe.  But if you want to turn it into a cocktail for the grown ups, you can add 1/2 a cup of liqueur of your choice, such as vodka, tequila, or gin.  Or, simply substitute the club soda with some sparkling wine.  It’ll be just as delicious!

How to Make Creepy Eyeballs Halloween Brew – Kids Friendly Party Recipe 鬼異眼球萬聖節特飲   http://uTry.it

This recipe is so easy to prepare!  If you haven’t watch the tutorial yet, you’ve got to check it out now.  Not only you’ll see how simple this recipe is, but you'll also get to check out the special guest who demonstrated the tutorial for us.  Since I made this recipe just for my family, I kept it to a rather small portion.  If you are serving this at a party, you might want to multiply the recipe to accommodate the number of guests that you have. 

How to Make Creepy Eyeballs Halloween Brew – Kids Friendly Party Recipe 鬼異眼球萬聖節特飲   http://uTry.it

In today’s recipe, I added some dry ice for the smoky and spooky effect.  It’s so much fun to use and it’s simply amazing.  It totally transformed the drink and took it to a whole new level.  The dry ice is actually easier to obtain and more affordable than I thought.  I was wondering and googling where to buy the dry ice.  Turned out, it was available in several local supermarkets near me.   If you plan on using dry ice in your drinks, I suggest that you call your local markets to make sure they have it in stock before driving there.

How to Make Creepy Eyeballs Halloween Brew – Kids Friendly Party Recipe 鬼異眼球萬聖節特飲   http://uTry.it

I kept the dry ice in an insulated ice chest as suggested by the packaging (do not keep in the freezer or a closed environment as the dry ice will release carbon dioxide when it “melts”.)  I highly recommend that you get it right before or a couple of hours before the party if you plan to use it.   And make sure you follow the safety instructions on the package.

How to Make Creepy Eyeballs Halloween Brew – Kids Friendly Party Recipe 鬼異眼球萬聖節特飲   http://uTry.it

Ever wonder what dry ice is made out of?  Dry ice is the solid form of carbon dioxide.  It sublimates at –109.3F.  With its extremely cold temperature, we need to handle it with cautions and never touch the dry ice with your bare hands as you might get frostbite!  I was wearing gloves and using tongs when I had to add the dry ice to my drinks.  Don’t worry, the dry ice is totally safe!  Because of its heavier weight, the dry ice immediately dropped to the bottom of the glass/punch bowl.  Just make sure to sip your drink slowly so the dry ice is all melted by the time you finish your drink.  And it mostly will.  And please refrain yourself from getting the dry ice inside your mouth because it can burn your skin/mouth! 
 
How to Make Creepy Eyeballs Halloween Brew – Kids Friendly Party Recipe 鬼異眼球萬聖節特飲   http://uTry.it

Moving on to anther ingredient of this drink, the creepy eyeballs!  They are made out of canned lychees filled with fresh blueberries.  Lychee is one of my favorite tropical fruit to enjoy (check out this lychee martini recipe that I shared in the past and see how they look when they're fresh).  With a little bit of grenadine syrup added to the lychees, they sure looked like bloody eyeballs!  I’ll list the ingredients used at the end of the post for your convenience.

How to Make Creepy Eyeballs Halloween Brew – Kids Friendly Party Recipe 鬼異眼球萬聖節特飲   http://uTry.it

I hope you enjoyed today’s fun and easy recipe!  Leave me a comment if you have questions or if you’ve tried the recipe.  I would love to hear from you.  Remember, Eat, Drink, and Be Happy!  Stay tuned for more fun recipe next week!  Wish you all a happy and safe Halloween! 

Ingredients and Tools Used:
Grenadine Syrup (Click here for more information)
Cranberry Juice (Click here for more information)

Club Soda (Click here for more information)
Halloween Beaker Glasses (Click here for more information)
Halloween Glass Flask (Click here for more information)
Large Slant Cut Glass Bowl (Click here for more information)
Stainless-Steel Tongs (Click here for more information)
Insulated Foam Box (Click here for more information)


Disclaimers
Please follow manufacturer and safety instructions when handling dry ice.


Disclosure: uTry.it is a participant in the Amazon Services LLC Associates Program, an affiliate advertising program designed to provide a means for sites to earn advertising fees by advertising and linking to Amazon.com.

Saturday, October 7, 2017

How to Make Witch's Fingers Shortbread Cookies - Halloween Recipe 女巫手指餅乾 - 萬聖節食譜


Do you like Halloween?  To be honest, it’s not my favorite holiday of the year.  However, I do enjoy creating fun treats and scary snacks for friends and family.   It’s one of the occasions where I can let my creativity runs wild!

How to Make Witch's Fingers Shortbread Cookies -  Halloween Recipe 女巫手指餅乾 - 萬聖節食譜  http://uTry.it

Today, I’m sharing these creepy Witch’s Fingers Shortbread Cookies with you.  This recipe is my classic go-to shortbread recipe, as I've shared here in the past.   It’s actually quite easy to shape them into “fingers” form.  The details and decorations couldn’t be any easier to add on as well.  Be sure to watch the video tutorial on my YouTube channel for all the details and tips.

How to Make Witch's Fingers Shortbread Cookies -  Halloween Recipe 女巫手指餅乾 - 萬聖節食譜  http://uTry.it

When I serve these Witch’s Fingers, my Little Boy likes to dip them in strawberry preserves for a bloody effect!  My Baby Girl is a bit less graphic, she chose a mud puddle, a.k.a chocolate sauce as her dipping option!  Either way, these cookies are super fun to eat and just as finger licking good as-is.

How to Make Witch's Fingers Shortbread Cookies -  Halloween Recipe 女巫手指餅乾 - 萬聖節食譜  http://uTry.it

These Witch’s Fingers are perfect for Halloween Party.  Last year, I packed them up to share with some school friends and they were a big hit!  You can make them a day or two in advance and store them in an air-tight container.  They stay fresh for at least 5 to 6 days if you store them well without direct sunlight.

How to Make Witch's Fingers Shortbread Cookies -  Halloween Recipe 女巫手指餅乾 - 萬聖節食譜  http://uTry.it

How’s your Halloween planning so far?  Do you or your kids dress up?  It’s was such a surprised that my Kiddos have decided so early on what/who they want to be this Halloween.  It’s even more surprising to me that I’ve their costumes already prepared!  They only need a few final touches here and there and that’s it.  Yes, this year's costumes are partially handmade.  But luckily, nothing too complicated.  Phew…. just a side note, I’m just happy that the kiddos are not into scary costumes, at least not yet! 

How to Make Witch's Fingers Shortbread Cookies -  Halloween Recipe 女巫手指餅乾 - 萬聖節食譜  http://uTry.it

I hope you enjoyed today's recipe and tutorial.  Stay tuned for another fun and easy Halloween treat next week!  BOO!

How to Make Witch's Fingers Shortbread Cookies -  Halloween Recipe 女巫手指餅乾 - 萬聖節食譜  http://uTry.it


Tools and Ingredients Used:
Valrhona Unsweetened Cocoa Powder (Click here for more information)
Sliced Almonds 
(Click here for more information)

Organic Vanilla Extract (Click here for more information)

Kerrygold Salted Butter (Click here for more information)

Measuring Spoons Set (Click here for more information)

Silicone Pastry Brush 
(Click here for more information)

Stand Mixer (Click here for more information)

Cooling Racks (Click here for more information)

Rolling Mat (Click here for more information)

Baking Sheets 
(Click here for more information)


Disclosure: uTry.it is a participant in the Amazon Services LLC Associates Program, an affiliate advertising program designed to provide a means for sites to earn advertising fees by advertising and linking to Amazon.com.

Sunday, August 20, 2017

How to Make Piña Colada Poptails:


How was your summer holiday?  I hope you were able to get some time off from work and hang out with your family.  We surely had an amazing vacation this summer and I couldn’t wait to share more details with you. I would love to hear where you’ve been and what you’ve done this summer.  So feel free to leave me a comment below.  

How to Make Piña Colada Poptails   http://uTry.it

What are the key ingredients of an ideal holiday for you?  To me, it’s not a holiday until you’re sipping a nice cocktail with a nice view in front of you!  Forget about all the stress and responsibilities for a while.  Well, even for a few days a year, it’s still nice.  Our bodies and minds definitely need a break and some rest to recharge, so that we can work harder and reach higher after the break.  Don’t you agree?

Although summer vacation might be over, we can still enjoy a little treat over the weekends to bring back those fond memories!  These Piña Colada Poptails definitely bring me back to the tropical paradise instantly!  While they taste just like the cocktail themselves, why not have some fresh fruits and vitamin C at the same time?

How to Make Piña Colada Poptails   http://uTry.it

If you haven’t done so, check out my video tutorial above.  I’ll show you how to easily cut these pineapple spears to prepare these poptails.  By the way, Poptails = Popsicle + Cocktail.  I’m sure you don’t need any explanation here, but just in case. These Piña Colada Poptails are so refreshing and so much fun to eat.  They are perfect for parties and gatherings.  Or, whenever you need a 'healthier' cocktail. 

How to Make Piña Colada Poptails   http://uTry.it

There is one thing that I forgot to mention in my video.  It has to do with the rum that you would used to soak the pineapple spears.  Please do not throw them away after soaking!  You can use them to make some nice cocktail later.  Maybe a Piña Colada?  Simply keep the rum in the fridge until you’re ready to use it.  I hope you enjoy today’s post and recipe!  And remember, Eat, Drink, and Be Happy!  Stay tuned for more fun and delicious recipe next week!

How to Make Piña Colada Poptails   http://uTry.it


Tools and Ingredients Used:
Pitcher (Click here for more information)
Long Bamboo Skewers 
(Click here for more information)

Maraschino Cherries with Stems (Click here for more information)
Coconut Cream (Click here for more information)
Coconut Flakes (Click here for more information)
Silicone Pastry Brush (Click here for more information)


Disclosure: uTry.it is a participant in the Amazon Services LLC Associates Program, an affiliate advertising program designed to provide a means for sites to earn advertising fees by advertising and linking to Amazon.com.

Friday, June 30, 2017

Chocolate Cupcakes with Swiss Meringue Buttercream Flowers - Featuring Russian Piping Tips


Have you heard of Russian Piping / Icing Tips before?  They are my latest discovery and obsession!  Think about it, for someone who is not very good at decorating with buttercream and frosting, I actually managed to create these gorgeous flower cupcakes!  It’s got to be a foodie blogger’s dream comes true!

Chocolate Cupcakes with Swiss Meringue Buttercream Flowers - Featuring Russian Piping Tips http://uTry.it

The piping tips are quite easy to use and the results are simply stunning!  Look at these cupcakes for a second, aren’t they gorgeous?  I say they are definitely the most beautiful cupcakes that I’ve ever created!  

Chocolate Cupcakes with Swiss Meringue Buttercream Flowers - Featuring Russian Piping Tips http://uTry.it

The icing/piping tip set that I’ve got online comes with 10 metal tips, and one plastic tip that allow you to put 3 different colored icing in 1 pastry bag.  In this recipe and video tutorial, I’m only testing 2 of them and the rest have got to wait for another time.  The 2 piping tips I used for this post are the roses and tulips shaped ones.  The buttercream flowers that I created using these piping tips are simply breath taking!  If I can do it, anyone can definitely do it as well!

Chocolate Cupcakes with Swiss Meringue Buttercream Flowers - Featuring Russian Piping Tips http://uTry.it

Besides trying out new icing tips, I’m also testing out these “Color Cups” cupcake liners for the very first time.  I’m definitely in love with them.  As you can see, the cupcake liners truly stay vibrant even after baking!  They are just as easy to use when compared to everyday paper cupcake liners.  They are only slightly more expensive than the regular liners. In my humble opinion, they are totally worth the extra bucks especially if you’re baking for parties and gatherings!

Chocolate Cupcakes with Swiss Meringue Buttercream Flowers - Featuring Russian Piping Tips http://uTry.it

These cupcakes are simply scrumptious!  The cupcakes are dark chocolate cupcakes using my favorite Valrhona Unsweetened Cocoa Powder for the deep chocolatey flavors.  The cupcakes are super easy to put together and they are moist and fluffy!

Chocolate Cupcakes with Swiss Meringue Buttercream Flowers - Featuring Russian Piping Tips http://uTry.it

The cupcakes are topped with Vanilla Bean Swiss Meringue Buttercream that are smooth and silky!  I dyed it into 4 different colors using some store-bought all-natural food coloring.  You can see all the products that I used in today’s video tutorial above and I’ll also list them out at the end of this post for your convenience!  If you’re not sure about creating your own gorgeous cupcakes for your next tea party or for someone’s birthday, think again!  These Russian Piping Tips definitely boosted my confident in cake/cupcake decorating and I can foresee more cupcakes in my kitchen in the near future!

Chocolate Cupcakes with Swiss Meringue Buttercream Flowers - Featuring Russian Piping Tips http://uTry.it

Thank you so much for stopping by today!  Remember, Eat, Drink, and Be Happy!  See you all next week with another fun recipe!

Tools and ingredients used:
Cupcake Pan (Click here for more information)
Color Cups Cupcake Liners (Click here for more information)

Valrhona Unsweetened Cocoa Powder (Click here for more information)

Cake Flour (Click here for more information)

Ice Cream Scoop (Click here for more information)

Whisk (Click here for more information)

Russian Piping Tips Set (Click here for more information)

Wilton #67 Leaf Piping Tip (Click here for more information)

Disposable Piping Bag (Click here for more information)

All Natural Food Coloring (Click here for more information)

Organic Vanilla Extract (Click here for more information)

Measuring
Spoons Set (Click here for more information)
Stand
Mixer (Click here for more information)
Cooling Racks (Click here for more information)

Baking Sheets (Click here for more information)

Kerrygold Butter (Click here for more information)

Heat Proof Measuring Cups (Click here for more information)


Disclosure: uTry.it is a participant in the Amazon Services LLC Associates Program, an affiliate advertising program designed to provide a means for sites to earn advertising fees by advertising and linking to Amazon.com.

Saturday, June 24, 2017

How to Make Unicorn Poop Rainbow Sour Lemon Meringue Cookies 檸檬彩虹蛋白曲奇:


Are you ready for another magical and whimsical recipe?  A recipe that involves a mysterious, fascinating, and imaginary create!  Yes, I'm talking about the Unicorn! After all, everything associated with the Unicorn has been so gorgeous and adorable, even with its byproduct such as... its poop!?

How to Make Unicorn Poop Rainbow Sour Lemon Meringue Cookies 檸檬彩虹蛋白曲奇 with all natural coloring.   http://uTry.it

Sorry, I just couldn’t help it!  I had so much fun making these Sour Lemon Meringue Cookies with my Little Girl.  We were laughing, joking, and goofing around in the kitchen as we bake and enjoy each other's company…and these cookies, of course!

How to Make Unicorn Poop Rainbow Sour Lemon Meringue Cookies 檸檬彩虹蛋白曲奇 with all natural coloring.   http://uTry.it

If you haven’t watched my video tutorial yet, you’ve got to check it out.  I guaranteed that you won’t be disappointed! I’ll show you step by step procedures on how to create the perfect rainbow swirls that shaped these cookies.  They are actually easier than you think.  Plus, you’ll get my tips and secret on how to make the perfect meringue cookies!        

How to Make Unicorn Poop Rainbow Sour Lemon Meringue Cookies 檸檬彩虹蛋白曲奇 with all natural coloring.   http://uTry.it

These rainbow colored Sour Lemon Meringue Cookies are made from all natural food coloring deprived from fruit and vegetables (I’ll link my food coloring tutorials below this post).  If you don’t have the time to make your own coloring, I’ve found out that my local health-food store/supermarket do carry some all natural coloring options.  I’ll list the product links below this post so that you can check them out as well. 

How to Make Unicorn Poop Rainbow Sour Lemon Meringue Cookies 檸檬彩虹蛋白曲奇 with all natural coloring.   http://uTry.it

If you’ve baked meringue cookies before, you know that they don’t like moisture!  So, we bake them at low temperature for a long time.  Plus, we need to be careful on the flavoring option as well.  Since I made these in lemon flavor, I use lemon zest to give these cookies the refreshing lemony aroma.  But for the tartness, I used citrus acid (which is really sour and in powder form) instead of fresh lemon juice.  That way, I won’t be adding too much moisture into the batter. 

How to Make Unicorn Poop Rainbow Sour Lemon Meringue Cookies 檸檬彩虹蛋白曲奇 with all natural coloring.   http://uTry.it

These cookies are so light, crispy, and packed with lemony aroma.  The sweetness and tartness is perfectly balanced!  Give them a try and you’ll fall in love with them.

How to Make Unicorn Poop Rainbow Sour Lemon Meringue Cookies 檸檬彩虹蛋白曲奇 with all natural coloring.   http://uTry.it


I hope you enjoyed today’s post and recipe!  Remember, Eat, Drink, and Be Happy!  Stay tuned for more fun recipe next week!


Ingredients and Tools Used:
All Natural Food Coloring (Click here for more information)
Wilton 1 A Round piping tip (Click here for more information)
Citrus Acid (Click here for more information)
Edible Gold Leaves (Click here for more information)

Disposable Piping Bag (Click here for more information)
Silver Dragees (
Click here for more information)
Freeze Dried Strawberry
(Click here for more information)
S
tand Mixer (Click here for more information)
Cooling Racks (
Click here for more information)
Corn Starch (粟粉) (
Click here for more information)
Edible Gold Stars (
Click here for more information)
Baking Sheets (
Click here for more information)
Silpat (
Click here for more information)

How to Make All Natural Blue Food Coloring Tutorial:
https://goo.gl/8nT8Sm

How to Make All Natural Red Food Coloring Tutorial:
https://goo.gl/zTcc2h

Disclosure: uTry.it is a participant in the Amazon Services LLC Associates Program, an affiliate advertising program designed to provide a means for sites to earn advertising fees by advertising and linking to Amazon.com.

Friday, May 19, 2017

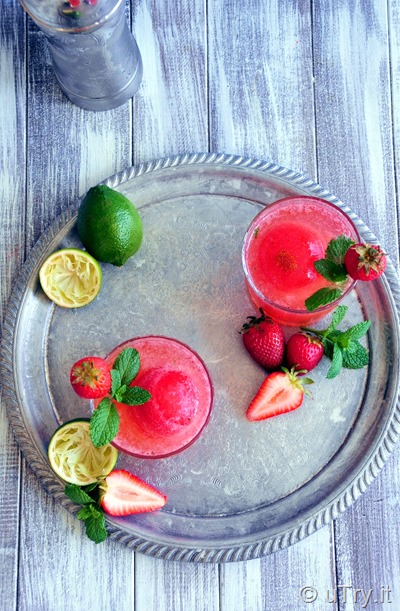
Strawberry Mojito with Giant Strawberry Ice Sphere


Are you enjoying the strawberry season like I do?  I certainly hope so.  Today, I want to share this super fun cocktail with you that combined 2 of my favorite things, strawberries and Mojito!

Strawberry Mojito with Giant Strawberry Ice Sphere  http://uTry.it

In a traditional Mojito, this cocktail consists of white rum, sugar, lime juice, soda water, and mint.  It’s a super refreshing cocktail that has a combination of sweetness, refreshing citrus and mint that complement the potent of the rum.  The soda water adds a little evanescent that takes this refreshing cocktail to another level.

Strawberry Mojito with Giant Strawberry Ice Sphere  http://uTry.it

In my version of Mojito, not only that I muddle in some fresh strawberries along with the mint leaves, there’s also a strawberry simple syrup along with a giant strawberry ice sphere that makes this drink looks super cool, in my opinion!  Pun intended! 

Strawberry Mojito with Giant Strawberry Ice Sphere  http://uTry.it

Don’t you love the vibrant color of this drink?  I absolutely love how gorgeous it looks and it tastes just as amazing!  It’s slightly sweet and the tartness from the fresh lime juice and strawberries balanced well with each other.

Strawberry Mojito with Giant Strawberry Ice Sphere  http://uTry.it

If you’re hosting a Spring or Summer party! You’ve got to prepare this cocktail!  For me, this Strawberry Mojito is definitely a Friday 5 o’clock regular! It’s the perfect way to unwind a work week!  I hope that you enjoy today’s recipe and tutorial.  Stay tuned for more fun and refreshing recipe next week!  Cheers!

Strawberry Mojito with Giant Strawberry Ice Sphere  http://uTry.it


Tools and Ingredients used  (May contain affiliate links):

Tovolo Ice Sphere Mold (Click here for more information)
Ninja Blender (Click here for more information)
Potato Masher (Click here for more information)

Cocktail Shaker (Click here for more information)
Old Fashion Glasses (Click here for more information)

Mojito Glasses (Click here for more information)

Perrier Sparkling Natural Mineral Water
 (Click here for more information)


Please drink responsibly.  Health and General Disclaimers.


Saturday, April 1, 2017

Smoked Salmon Deviled Eggs 親子烟熏三文魚復活蛋 - For Easter


Are you enjoying your Spring Break so far?  For those of you who haven’t gotten any time off (just yet), hang in there!  My kids have been waiting for the longest time to get some days off from school as well.  If you’re having gatherings and looking for Easter Sunday Brunch ideas, you’re in luck today.  Check out these Smoked Salmon Deviled Eggs 親子烟熏三文魚復活蛋!  Aren’t they gorgeous?  Let me tell you, they taste just as fantastic as they look, too! 

Smoked Salmon Deviled Eggs 親子烟熏三文魚復活蛋 -  For Easter   http://uTry.it   http://YouTube.uTry.it

If you have had your fair share of deviled eggs in the past, you’ve got to try out this recipe for a change.  The wild smoked salmon in this recipe truly bring this classic party appetizer to a whole new level!  The smokiness and gourmet flavor of smoked salmon is amazing.  The mild onion aroma from the chives and the lemony dill are just perfect companies to the salmons. 

Smoked Salmon Deviled Eggs 親子烟熏三文魚復活蛋 -  For Easter   http://uTry.it   http://YouTube.uTry.it

Of course, I didn’t just stop there either!  These decadent Smoked Salmon Deviled Eggs are topped with salmon eggs (roes) for the finishing touch!  As much as I love sushi and sashimi, I’m not a big fan for salmon eggs in the past!  That was true until after I had my very first bite of this gorgeous treat!  The salmon eggs add a little pop and saltiness to these creamy and silky deviled eggs.   The flavors and aromas are well balanced in this little jewel-like appetizer! 

Smoked Salmon Deviled Eggs 親子烟熏三文魚復活蛋 -  For Easter   http://uTry.it   http://YouTube.uTry.it

If you haven’t watch the video tutorial for this recipe, you’ve got to click on the link above and check it out.  I spelled out the little tips and secrets on how to make the perfect hard-boil eggs, which is the basic/foundation to make deviled eggs; as well as piping tips and fun facts!  So, be sure to subscribe and watch the tutorial!  I hope you enjoy today’s recipe and video.  Stay tuned for more fun and easy recipes next week!  

Smoked Salmon Deviled Eggs 親子烟熏三文魚復活蛋 -  For Easter   http://uTry.it   http://YouTube.uTry.it


Tools and Ingredients Used: 


Pastry Bags  (Click here for more information)
Large Open Star Piping Tip (Click here for more information)
Deviled Egg Platter
 (Click here for more information)
Ceramic Egg Tray 
 (Click here for more information)
Japanese Mayo 
 (Click here for more information)