Showing posts with label How-to. Show all posts

Saturday, February 9, 2019

How to Revive and Use Dried Vanilla Beans


Let’s talk about Vanilla Beans.  Do you use whole vanilla beans in your recipes?  I personally love and adore vanilla beans.  They have this unique, sweet, floral, and earthy (depending on the regions) aromas that you don’t get from any other ingredient.  They certainly make any baked goods and desserts tasted gourmet.  Ever since the shortage of vanilla beans a few year ago, the price of them had been sky-rocketed.  (That is totally a different topic so I’m not going to go in-depth today).

My point is, since vanilla beans are so expensive, you do want to utilize them the best you could so that nothing goes to waste.  If you live in an area that has a dry climate (such as Southern California), you might have experienced that your vanilla bean dried out before you use it.  No need to panic!  I’m here for the rescue today.  Watch my video below on how to revive a dried vanilla bean and many different ways you can use them. 


If you’ve missed my previous video, click below to watch the tutorial on how to split and seed a vanilla bean and other usage ideas.


If you have any other questions, please feel free to leave me a comment below.  

For more product information and vanilla recipes, please visit www://SingingDogVanilla.com


Vanilla Simple Syrup

Ingredients:
1 vanilla bean
1 cup sugar
1 cup water

1) Place all ingredient in a medium pot.  Let the mixture simmer for 5 minutes, stir occasionally.  Let cool completely before use.

2) The simple syrup is wonderful to mix into teas, cocktails, and fruit punches.


Vanilla Spice Poached Pears

Ingredients:
2 Semi-Ripe Pears, peeled
3 Cups water
1 cup Sugar
1 lemon, peel off rind and juiced
1 cinnamon stick
2 cloves
1 star anise
1 vanilla bean

1) Place all ingredient, except the pears, in a medium pot. Heat mixture over high heat until it comes to a boil.

2) Lower the heat to a simmer and add in the pears.  Simmer for 20 minutes or until fork tender.


3) Let pears cool slightly and enjoy them warm or at room temperature!  Accompany poached pears with a scoop of vanilla ice cream, dark chocolate sauce, or fresh berries.


Vanilla Lavender Bath Salt

Ingredients:
1 cup of lavender Epsom Salt
1/2 cup sea salt
1 tablespoon dried lavender buds
A few drops of purple soap colorant (Optional)
1 dried vanilla bean, break into thirds

Stir all ingredients together until well incorporated.  Transfer to an air tight container until ready to use (preferably after a week to let the vanilla bean infused into the bath salt). 

To Use:
Scoop 1/2 a cup of the bath salt mixture and add into a tub of bath water.  Soak, relax, and enjoy!  


Thank you Singing Dog Vanilla for sponsoring these videos.


Friday, December 8, 2017

How to Fold Christmas Tree Napkins – A Festive Holiday Tablescape and Place Card Idea


Are you ready for the holiday?  If you’re hosting a Christmas party this year, I have a wonderful tablescape and place card idea for you.  I promise, it’s quick, easy, and festive!  After all, we don’t want to spend all day fixing/setting the table while we have a feast to prepare, don't we?  On a side note, my kids are into origami (art of paper folding) and therefore they totally enjoyed folding these Christmas Tree Napkins.  So, you might want to put your little helpers to work as well!  Yes, it’s so easy that kids can do it too!

How to Fold Christmas Tree Napkins – A Festive Holiday Tablescape and Place Card Idea   http://uTry.it

See how festive this table setting is?  In addition to the visual, I wish you can smell it too.  Because I added a cinnamon stick to mimic the tree trunk and the whole plate simply smells wonderful.  I think cinnamon is one of my favorite aroma for the holidays!  It’s warm and earthy.  I feel so relax and calm sniffing it in!   

How to Fold Christmas Tree Napkins – A Festive Holiday Tablescape and Place Card Idea   http://uTry.it

I tied a little bow tie with Christmas colored ribbon on the cinnamon stick (or you can use kitchen twine as well) so that your guest can take it home and hang it on their Christmas tree after the party!
  
How to Fold Christmas Tree Napkins – A Festive Holiday Tablescape and Place Card Idea   http://uTry.it

The step-by-step pictorial above give you an idea of the steps.  But since I created a video tutorial for you, I think it’s even easier to just watch the video and follow along.  Have fun with this little project! And below are the materials you’ll need for this Christmas Tree Napkin!  Stay tuned for more festive recipe next week!


Christmas Tree Napkins:
Makes: 1 tables setting (simply multiply with number of guests/settings needed)

1 square green napkin  (
Click here for more information)
1 cinnamon stick (
Click here for more information)
1 (12-inch) long ribbon or kitchen twine (
Click here for more information)
1 Gold star sticker (
Click here for more information)
1 Christmas Berries sticker (
Click here for more information)
1 small holiday post-it (
Click here for more information)
Green Handle Flatware (Click here for more information)
White Dinner Plates (Click here for more information)
Silver Charger (Click here for more information)


Disclosure: uTry.it is a participant in the Amazon Services LLC Associates Program, an affiliate advertising program designed to provide a means for sites to earn advertising fees by advertising and linking to Amazon.com.


Saturday, September 23, 2017

How to Make S’more Ice Cream Pie


Yesterday marked the first day of Fall!  The weather has been comfortable and mostly cooled down.  But it’s still nice and warm in the afternoon so my Kids are stilling craving for cool desserts most of the time.  The solution?  This scrumptious S’more Ice Cream Pie!

How to Make S'more Ice Cream Pie (No-Bake Dessert)  http://uTry.it

S’more is one of my Kids’ favorite treats.  I don’t make them too often, so it remains as a special and occasional treat for them.  But before I am ready for the cozy campfire and traditional S’more, this S’more Ice Cream Pie is the best transitional treat in between the Summer and Fall.  It combines the best of both world with the comforting gooey and charred marshmallow on top as well as refreshing ice cream filling.  Plus, who doesn’t like magic chocolate shells and chocolate graham cracker crust?  Yes, these are all the components of this pie.  The perfectly sinful and delicious combination, all in one easy-to-prepare pie!  If you haven’t watch the video tutorial above, please check it out.  You’ll agree that this pie is super easy to put together.

How to Make S'more Ice Cream Pie (No-Bake Dessert)  http://uTry.it


This recipe calls for a total of 3 cups of softened vanilla ice cream.  You can use homemade ones or store bought ones.  However, when I was making this pie, I realized that I didn’t have enough vanilla ice cream while preparing for the 2nd layer!!!  As much as I prefer my homemade ice-cream recipe over store bought ones, I also didn’t want to drive to the store for just 1/2 a cup of ice cream!  So, I improvised and substituted with coffee ice cream instead.  It turned out quite delicious with a more complex of flavor.  Next time, I’m going to try with a layer of chocolate ice cream as well!  So, by all means, explore and experiment with different flavors of ice cream when you make this pie!  Just like everything else in life, we need to learn to be flexible.  My new motto of the week, “Keep Calm and Eat Pie!”

How to Make S'more Ice Cream Pie (No-Bake Dessert)  http://uTry.it

For the coming weeks, I’ll be posting some traditional recipes for the Chinese Mid-Autumn festival as well as fun treats for Halloween.  If you have any recipe request or suggestion, please feel free to leave a comment below and I’ll try my best to post them before the festivals.  Remember, Eat, Drink, and Be Happy!  Thank you for stopping by today and I’ll see you next week! 

Tools and Ingredients Used:
Kitchen Torch (Click here for more information)
Butane for Torch (Click here for more information)

9-inch Pie Plate (Click here for more information)

Organic Semi-Sweet Chocolate Chips (Click here for more information)

Organic Honey Graham Crackers (Click here for more information)

Ninja Food Processor Set (Click here for more information)

Mini Marshmallows 
(Click here for more information)


Disclosure: uTry.it is a participant in the Amazon Services LLC Associates Program, an affiliate advertising program designed to provide a means for sites to earn advertising fees by advertising and linking to Amazon.com.


Friday, June 30, 2017

Chocolate Cupcakes with Swiss Meringue Buttercream Flowers - Featuring Russian Piping Tips


Have you heard of Russian Piping / Icing Tips before?  They are my latest discovery and obsession!  Think about it, for someone who is not very good at decorating with buttercream and frosting, I actually managed to create these gorgeous flower cupcakes!  It’s got to be a foodie blogger’s dream comes true!

Chocolate Cupcakes with Swiss Meringue Buttercream Flowers - Featuring Russian Piping Tips http://uTry.it

The piping tips are quite easy to use and the results are simply stunning!  Look at these cupcakes for a second, aren’t they gorgeous?  I say they are definitely the most beautiful cupcakes that I’ve ever created!  

Chocolate Cupcakes with Swiss Meringue Buttercream Flowers - Featuring Russian Piping Tips http://uTry.it

The icing/piping tip set that I’ve got online comes with 10 metal tips, and one plastic tip that allow you to put 3 different colored icing in 1 pastry bag.  In this recipe and video tutorial, I’m only testing 2 of them and the rest have got to wait for another time.  The 2 piping tips I used for this post are the roses and tulips shaped ones.  The buttercream flowers that I created using these piping tips are simply breath taking!  If I can do it, anyone can definitely do it as well!

Chocolate Cupcakes with Swiss Meringue Buttercream Flowers - Featuring Russian Piping Tips http://uTry.it

Besides trying out new icing tips, I’m also testing out these “Color Cups” cupcake liners for the very first time.  I’m definitely in love with them.  As you can see, the cupcake liners truly stay vibrant even after baking!  They are just as easy to use when compared to everyday paper cupcake liners.  They are only slightly more expensive than the regular liners. In my humble opinion, they are totally worth the extra bucks especially if you’re baking for parties and gatherings!

Chocolate Cupcakes with Swiss Meringue Buttercream Flowers - Featuring Russian Piping Tips http://uTry.it

These cupcakes are simply scrumptious!  The cupcakes are dark chocolate cupcakes using my favorite Valrhona Unsweetened Cocoa Powder for the deep chocolatey flavors.  The cupcakes are super easy to put together and they are moist and fluffy!

Chocolate Cupcakes with Swiss Meringue Buttercream Flowers - Featuring Russian Piping Tips http://uTry.it

The cupcakes are topped with Vanilla Bean Swiss Meringue Buttercream that are smooth and silky!  I dyed it into 4 different colors using some store-bought all-natural food coloring.  You can see all the products that I used in today’s video tutorial above and I’ll also list them out at the end of this post for your convenience!  If you’re not sure about creating your own gorgeous cupcakes for your next tea party or for someone’s birthday, think again!  These Russian Piping Tips definitely boosted my confident in cake/cupcake decorating and I can foresee more cupcakes in my kitchen in the near future!

Chocolate Cupcakes with Swiss Meringue Buttercream Flowers - Featuring Russian Piping Tips http://uTry.it

Thank you so much for stopping by today!  Remember, Eat, Drink, and Be Happy!  See you all next week with another fun recipe!

Tools and ingredients used:
Cupcake Pan (Click here for more information)
Color Cups Cupcake Liners (Click here for more information)

Valrhona Unsweetened Cocoa Powder (Click here for more information)

Cake Flour (Click here for more information)

Ice Cream Scoop (Click here for more information)

Whisk (Click here for more information)

Russian Piping Tips Set (Click here for more information)

Wilton #67 Leaf Piping Tip (Click here for more information)

Disposable Piping Bag (Click here for more information)

All Natural Food Coloring (Click here for more information)

Organic Vanilla Extract (Click here for more information)

Measuring
Spoons Set (Click here for more information)
Stand
Mixer (Click here for more information)
Cooling Racks (Click here for more information)

Baking Sheets (Click here for more information)

Kerrygold Butter (Click here for more information)

Heat Proof Measuring Cups (Click here for more information)


Disclosure: uTry.it is a participant in the Amazon Services LLC Associates Program, an affiliate advertising program designed to provide a means for sites to earn advertising fees by advertising and linking to Amazon.com.

Friday, May 19, 2017

Strawberry Mojito with Giant Strawberry Ice Sphere


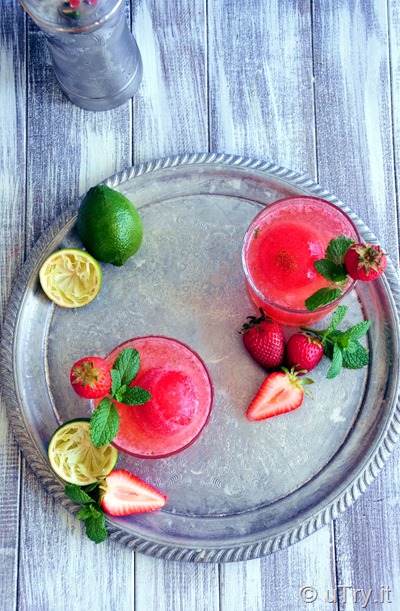
Are you enjoying the strawberry season like I do?  I certainly hope so.  Today, I want to share this super fun cocktail with you that combined 2 of my favorite things, strawberries and Mojito!

Strawberry Mojito with Giant Strawberry Ice Sphere  http://uTry.it

In a traditional Mojito, this cocktail consists of white rum, sugar, lime juice, soda water, and mint.  It’s a super refreshing cocktail that has a combination of sweetness, refreshing citrus and mint that complement the potent of the rum.  The soda water adds a little evanescent that takes this refreshing cocktail to another level.

Strawberry Mojito with Giant Strawberry Ice Sphere  http://uTry.it

In my version of Mojito, not only that I muddle in some fresh strawberries along with the mint leaves, there’s also a strawberry simple syrup along with a giant strawberry ice sphere that makes this drink looks super cool, in my opinion!  Pun intended! 

Strawberry Mojito with Giant Strawberry Ice Sphere  http://uTry.it

Don’t you love the vibrant color of this drink?  I absolutely love how gorgeous it looks and it tastes just as amazing!  It’s slightly sweet and the tartness from the fresh lime juice and strawberries balanced well with each other.

Strawberry Mojito with Giant Strawberry Ice Sphere  http://uTry.it

If you’re hosting a Spring or Summer party! You’ve got to prepare this cocktail!  For me, this Strawberry Mojito is definitely a Friday 5 o’clock regular! It’s the perfect way to unwind a work week!  I hope that you enjoy today’s recipe and tutorial.  Stay tuned for more fun and refreshing recipe next week!  Cheers!

Strawberry Mojito with Giant Strawberry Ice Sphere  http://uTry.it


Tools and Ingredients used  (May contain affiliate links):

Tovolo Ice Sphere Mold (Click here for more information)
Ninja Blender (Click here for more information)
Potato Masher (Click here for more information)

Cocktail Shaker (Click here for more information)
Old Fashion Glasses (Click here for more information)

Mojito Glasses (Click here for more information)

Perrier Sparkling Natural Mineral Water
 (Click here for more information)


Please drink responsibly.  Health and General Disclaimers.


Friday, May 5, 2017

Vietnamese Summer Rolls (Gỏi cuốn) 越式春捲


My family enjoys dining out at Vietnamese restaurants.  One of our favorite appetizers is this Vietnamese Summer Roll.  Check out my step by step video tutorial above to learn how to make them.

Vietnamese Summer Rolls (Gỏi cuốn) 越式春捲 http://uTry.it

Vietnamese Summer Rolls are very light and refreshing.  Definitely a healthier choice when compared to the deep fried egg rolls.  The fillings usually consist of many different types of vegetables, herbs, a choice of protein (I’m using shrimps today), and some bean threads or rice noodles.  The veggies are usually raw and the protein is cooked in boiling water.  Therefore, the flavor is rather mild.  That’s why, they are usually served with a flavorful dipping sauce.

Vietnamese Summer Rolls (Gỏi cuốn) 越式春捲 http://uTry.it

In my video tutorial, I’ll show you how to make both the Peanut Dipping sauce, and the Sweet and Spicy Dipping Sauce to accompany these delightful Summer Rolls.

Vietnamese Summer Rolls (Gỏi cuốn) 越式春捲 http://uTry.it

The Peanut Dipping Sauce consists of Hoisin Sauce, many describe it as the Asian version of B.B.Q. sauce.  It’s super easy to prepare and tastes very rich and earthy.  It’s one of the classic sauce to pair with these Vietnamese Summer Rolls.

Vietnamese Summer Rolls (Gỏi cuốn) 越式春捲 http://uTry.it

I personally love the Sweet and Spicy Dipping Sauce better.  I simply love spicy food, plus, this sauce is super refreshing.  In my video, I used both the Sambal Chili Paste and a chopped Thai Chili.  But if you prefer a milder taste, you can skip the Thai Chili and just use Sambal.  It’s not too spicy at all and packed with wonderful aroma that you won’t get from other chili sauce!

Vietnamese Summer Rolls (Gỏi cuốn) 越式春捲 http://uTry.it

I hope you enjoy today’s recipe and tutorial.  Stay tuned for more fun and delicious next week!

Ingredients used:
Rice Paper 
(Click here for more information)
Hoisin Sauce (Click here for more information)
Creamy Peanut Butter
 (Click here for more information)
Fish Sauce
 (Click here for more information)
Sambal Chili Paste
 (Click here for more information)
Bean Threads
 (Click here for more information)


Friday, February 17, 2017

Tonkatsu- Japanese Style Pork Cutlets (日式吉列豬扒):


Tonkatsu - Japanese Style Pork Cutlets (日式吉列豬扒) is one of my family’s favorite savory dish.  We used to order it a lot when we dine out.  The key word here is “used to”!  After trying my recipe at home, you can enjoy this dish at home whenever you feel like it! Why order out when you can make it tastier at home, right?

Tonkatsu- Japanese Style Pork Cutlets (日式吉列豬扒)   http://uTry.it

Tonkatsu is a pork cutlet that’s breaded with Japanese breadcrumbs (Panko) and deep-fried to golden brown perfection.  It’s quite irresistible because the flavor is wonderful.  The crust is super crispy and the pork chop inside is tender and juicy.  Instead of deep-frying the cutlets, I usually opt for a shallow fry as a healthier version.  If you haven’t watch my video tutorial, be sure to check it out because I’ll show you the tips and tricks on creating this amazingly crispy crust that stays put during the frying process.

Tonkatsu- Japanese Style Pork Cutlets (日式吉列豬扒)   http://uTry.it

To keep the pork chops juicy and tender, I used a half brining and half marinating method.  It’s important to let the pork chops to marinate overnight.  That way, they have a chance to absorb the moisture and flavors from the marinate.  You’ll be amazed by how juicy and tender your pork chops turn out!  Give this a try and you won’t be disappointed!  The list of ingredients for the marinate may seems quite long, but they are all pretty basic pantry ingredients for Asian cooking.  I’ll list the link of the products that I used at the end of the post for your reference.

Tonkatsu- Japanese Style Pork Cutlets (日式吉列豬扒)   http://uTry.it

I hope you enjoy today’s video and recipe.  Give it a try soon, I’m sure you and your family will love this dish as much as my family does!  Thank you for stopping by and have a wonderful week!

Tonkatsu- Japanese Style Pork Cutlets (日式吉列豬扒)   http://uTry.it


Ingredients and Tools used: 
Homemade Orange Marmalade:
https://goo.gl/lRjIra
Tonkatsu Sauce (Click here for more information)
Light Soy Sauce
 (Click here for more information)
ShaoXing Cooking Wine (Click here for more information)
Sesame Oil
 (Click here for more information)
Grapeseed Oil
 (Click here for more information)
Chicken bouillon powder 
 (Click here for more information)
White pepper powder
 (Click here for more information)
Corn starch
 (Click here for more information)
Zojirushi Rice Cooker (Click here for more information)
Cooling Racks (Click here for more information)
Baking Sheets
 (Click here for more information)
Chicken Broth
 (Click here for more information)
White Pepper Powder
 (Click here for more information)
Japanese Panko Bread Crumbs
 (Click here for more information)
Heavy Duty Copper Pan (Click here for more information)


Friday, January 27, 2017

How to Make Parchment Pastry Bag – for Cake Decorations


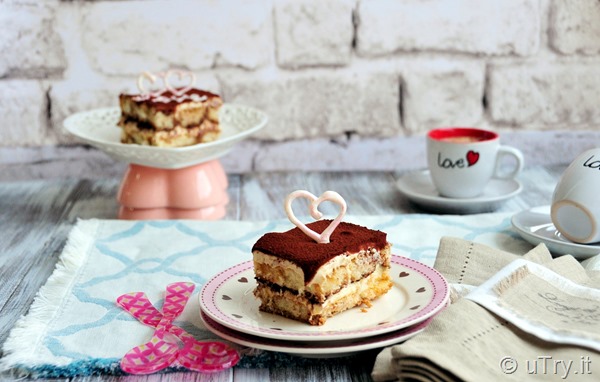
In just a few short weeks, it’ll be Valentine’s Day.  Do you and your sweetheart celebrate?  I usually make a special dinner and dessert at home to celebrate.  If you will be preparing a special dessert at home, I have a wonderful recipe for you coming very soon on the blog soon.  You’ve guessed it right, it’s the Classic Tiramisù that you see in the pictures below.  But before that, I wanted to show you how to make the white chocolate decorations on top first!

How to Make Parchment Pastry Bag – for Cake Decorations  http://uTry.it

Instead of using a regular pastry bag to pipe the chocolate decorations, a smaller one that’s made with parchment paper would be a better option in this case.  That way, you can use just a small amount of melted chocolate or icing instead of a big batch.  Besides, you can also cut out the size of the tip to tailor to your needs.  Remember! The bigger the cut, the thicker the line/drawing it will be for your decorations.  I’ll also post the link below on how to temper chocolate for your reference.   

How to Make Parchment Pastry Bag – for Cake Decorations  http://uTry.it

If you haven’t done so, be sure to check out the video tutorial above to see how to make the pastry bag.  It’s the perfect decorating tool for cakes and treats.  I hope you enjoy today’s quick video tutorial.  Stay tuned for the Tiramisù recipe soon. 

Don’t forget to subscribe to my YouTube channel here.  This way, you won’t miss out on any video and you’ll be the first to know when I have a new tutorial published. I share a new video tutorial/recipe every week.

How to Make Parchment Pastry Bag – for Cake Decorations  http://uTry.itq


Tools and Ingredients Used:

Parchment Pastry Bag (Click here for more Information)

White chocolate (Click here for more information)

Pink Pearl Dust (Click here for more information)


Click here to read more about tempering chocolate:
https://goo.gl/adYD17

Friday, September 16, 2016

Hawaiian Poke Bowl


Every once in a while, my family loves to dine out and try new restaurants.  We can’t help but noticed one of the latest restaurant trend is Poke Bowl!  It sure seems like there’s a new Poke Bowl restaurant open up every month in the nearby cities!  Poke (pronounced as poʊˈkeɪ) is a raw fish salad served as an appetizer in Hawaiian cuisine.  Poke is the Hawaiian verb for "section" or "to slice or cut".  Traditionally, the fish/seafood used for poke are ahi tuna, octopus, or salmon.  You can definitely explore and make it with different type of shellfish or seafood that you prefer.  Today, I chose salmon and made the poke with a hint of spiciness.  You can definitely adjust the level of spiciness by adding more or less chili sauce to your liking.

How to Make Hawaiian Poke Bowl  http://uTry.it

If you follow me on Instragram, you might recall that I shared a picture of my Homemade Salmon Poke a few months ago.  Since some of you asked me about the recipe, I decided that it would be best to share it here on my blog along with a video tutorial.  Thank you for your patience in waiting so long.  Well, what can I say.  This recipe is totally worth the wait!  Also, this Hawaiian Poke Bowl is super easy to prepare and only needs a few ingredients.  It’ll be one of the best poke bowl that you’ll ever eaten, no exaggeration!

How to Make Hawaiian Poke Bowl  http://uTry.it

The key to a successful Poke Bowl?  Make sure you use the best quality of seafood.  I used the sashimi-grand salmon here and the marinate ingredients for the poke are just a few Asian pantry staples.  I’ll list all these ingredients at the end of this post for your reference.  This recipe is so easy that you can put dinner on the table in less than 15 minutes!  Check out the video at the beginning of this post for the complete tutorial.  You’ll also find out how to make this gorgeous avocado flower as well.  It’s super easy and the creaminess texture of the avocado is the perfect compliment to the slightly tangy and spicy salmon poke as well. 

How to Make Hawaiian Poke Bowl  http://uTry.it

I hope you enjoy today’s video and recipe.  Please stay tuned for more fun and easy recipe next week.

Ingredients and Tools used:
Light Soy Sauce (Click here for more information)

Rice Vinegar (Click here for more information)
Hawaiian Salt
(Click here for more information)

Zojirushi Rice Cooker (Click here for more information)

Japanese Short Grain Rice (Click here for more information)

Sesame Oil (Click here for more information)

Black Sesame Seeds (Click here for more information)

White Sesame Seeds (Click here for more information)
Sriracha (Click here for more information)
 
Don’t forget to subscribe to my YouTube channel here.  That way, you won’t miss out on any video and you’ll be the first to know when I have a new tutorial published.

Monday, January 25, 2016

How to Make All Natural And Organic Red Food Coloring


Last summer, my family visited Hong Kong and China for a vacation.  During our stay, my Kids fell in love with Chinese Steamed Buns (Mantou or 饅頭 in Chinese.)   These steamed buns are soft and slightly sweet.  They are a wonderful side dish to enjoy with a meal (kind of like the idea of dinner rolls in the American cuisine).


It was also during our visit to Asia, we had a chance to visit the Hello Kitty Dim Sum restaurant (click here to read more).   That visit gave me an idea to turn the ordinary plain white steamed buns into something more adorable!  And these Piggy Chinese Steamed Buns were born.  These Piggies are special!  And I'm about to share with you a secret ingredient that I used to tint their ears, snouts and cheeks.  The ingredient is organic beet roots!  


Please check out my video tutorial above on how to make this wonderful red food coloring.  The color came out so beautiful and vibrant.  Best of all, the flavor is light and neutral so it won’t affect the taste of the food that you’re coloring with.  Plus, a little goes a long way!  You can use this natural food coloring to tint your pastry, bread dough, noodle, icing, cookies, and etc.  Anything that calls for liquid food coloring, basically.   I hope you enjoy today’s recipe and tutorial.  Stay tuned on the recipe in a few days on how to make these Piggy Chinese Steamed Buns!


Friday, November 20, 2015

3 Secrets to Making Tender and Fluffy Pancakes!


How to Make Blueberry Buttermilk Pancakes—3 Secrets to Making Tender and Fluffy Pancakes!   http://uTry.it

What is your family’s favorite breakfast?  Lately, we’ve been devouring our fair share of pancakes.  From simple plain ones, to banana walnut chocolate chip loaded ones; all wonderfully fluffy and scrumptious!  I have to say, my personal favorite are these flavorful and fluffy Blueberry Buttermilk Pancakes.  Before I post the the video tutorial and recipe, I wanted to share with you the 3 secrets to making super tender and fluffy pancakes first!  The secrets are quite simple, and if you follow them, I guaranteed that you’re going to fall in love with your homemade pancakes all over again!  They are even better than those at the pancake house.  No exaggeration!     


How to Make Blueberry Buttermilk Pancakes—3 Secrets to Making Tender and Fluffy Pancakes!   http://uTry.it

Secret #1:  Use room temperature ingredients!                
With room temperature ingredients (especially the wet ingredients), your batter will combine smoothly without big lumps.  Imagine if you add melted butter into icy cold buttermilk and egg, the butter will seized up into lumps and it’ll be a mess when you add the liquid into the flour mixture!  Please don’t let that happen!

 
How to Make Blueberry Buttermilk Pancakes—3 Secrets to Making Tender and Fluffy Pancakes!   http://uTry.it


Secret #2: Use buttermilk!
What is buttermilk?  Buttermilk is simply the liquid left behind after cream was churned into butter.  Lactic-acid bacteria is usually reintroduced into pasteurized buttermilk, hence the tangy flavor.   When you use buttermilk in baked goods and pancakes, it adds a subtle tang and increases the rise when it interacts with baking soda!  That’s what makes your pancakes more fluffy! 


How to Make Blueberry Buttermilk Pancakes—3 Secrets to Making Tender and Fluffy Pancakes!   http://uTry.it

Secret #3: Do NOT over mix the batter!
After adding the wet ingredients to the flour mixture.  Only mix the batter until just combined, about 20 seconds or so.  When you over mix the better, the gluten will start to develop in the flour and that will make the pancakes tough and chewy!  I guess no one would appreciate cardboard texture pancakes, right?  So, please do NOT over mix.  It’s okay if you still see some lumps in the batter! 


How to Make Blueberry Buttermilk Pancakes—3 Secrets to Making Tender and Fluffy Pancakes!   http://uTry.it
Now, the 3 secrets to making tender and fluffy pancakes are not secrets anymore!  I promise to post the video tutorial and recipe of these Blueberry Buttermilk Pancakes soon.  Stay tuned and have a beautiful weekend!

Wednesday, August 12, 2015

Cold Brew Coffee to Celebrate National Coffee Month!


Come check out how to make Cold Brew Coffee with this video tutorial.  It will probably be the best iced coffee you've ever tasted.  Super easy to make at home!  http://uTry.it

Did you know that August is National Coffee Month?  Now you do!  I didn’t know until I read it at several places over the internet recently.  But I couldn’t confirm who made up created all these National Month, and National days about food and drinks.  Such as National Martini Day (6/19), National Ice Cream Day (7/19), National Cheesecake Day (7/30),  National Pizza Day (11/12), etc.  These special days certainly had me crave for certain food or drinks from time to time, as if I don’t already consume enough without the reminders!!!  hahaha….So, if you could shed some lights about how these National days were established, please share in the comment session below. 

Come check out how to make Cold Brew Coffee with this video tutorial.  It will probably be the best iced coffee you've ever tasted.  Super easy to make at home!  http://uTry.it

According to the National Coffee Association’s (NCA) National Coffee Drinking Trends (NCDT) market research study, 83% of the U.S. adults reporting they drink coffee. In fact, it is the second most traded commodity on Earth – right behind oil.  I sure did my fair share in contributing to these numbers on a daily basis.  I don’t know about you, but I feel that I am not fully awake in the morning without a cup of joe in my hand!  I usually opt for a hot coffee in the morning, strong and bold.  But I love a refreshing iced coffee in the afternoon, especially in the summer.  One method of making iced coffee is brewed it hot and then served over ice to cool it down.  On the other hand, cold brew coffee is brewed entirely with cold or lukewarm water over a longer period of time.  I’m going to show you in just a minute on how to make that.

Come check out how to make Cold Brew Coffee with this video tutorial.  It will probably be the best iced coffee you've ever tasted.  Super easy to make at home!  http://uTry.it

Why cold brew method, you might ask.  Here are the reasons why.  With the cold brew method, it minimizes the chance of having the acidity or bitterness that comes with brewing coffee with hot water.  Thus, you will get a smooth, sweet, and bitter-free coffee that tastes wonderful over ice.  Plus, this cold brew coffee is super easy to prepare.  Ever since I gave it a try, I’d never go back to the old method when I prepare my iced coffee!  Below is the video tutorial on how to make it.


I hope you enjoyed watching my video tutorial.  If you haven’t done so, please subscribe to my YouTube channel here.  You’ll be the first to know when I have new video tutorials published. 
 
Come check out how to make Cold Brew Coffee with this video tutorial.  It will probably be the best iced coffee you've ever tasted.  Super easy to make at home!  http://uTry.it


For the cold brew coffee, I suggest that you taste it before adding any sweetener or cream.  I love mind with a little half and half and no sweetener as cold brew coffee tastes sweeter than the regular brewed coffee.  How do you usually like your coffee?  I would love to hear from you.  And cheers to National Coffee Month!


Wednesday, March 11, 2015

How to Fold Paper Napkins For Parties and Gatherings


How to Fold Paper Napkins For Parties and Gatherings   http://uTry.it

I hosted and attended many parties and gatherings.  Many are very memorable, not necessarily in a good way though.  I’m far from being a great hostess as I’m still learning and there’s always room for improvement.  One important thing that I have learned is to plan ahead.  It makes a party a lot more organized and smooth, let alone, more fun for everyone.  For example, have you ever been to a party where it didn't have enough utensils (or it didn't provide the proper utensils)?  Unless you are only serving finger foods for the whole event (or that you don’t mind your guests eating spaghetti with meat sauce with bare hands); otherwise, better remember to have the utensils well prepared!   Today, I want to share with you how to fold these adorable paper napkins that you can put the different utensils inside.  These are so easy to make and your guests can simply grab one and go (or stay).  Each "package" has everything that they need so they don’t have to search high and low for utensils.

How to Fold Paper Napkins For Parties and Gatherings   http://uTry.it


Check out my video tutorial below for the step by step instructions! 


Super easy, isn't it.  I hope you enjoyed my video tutorial.  If you haven’t done so, please subscribe to my Youtube channel here.  You’ll be the first to know when I have new video tutorials published.  Now, you're all set in preparing utensils for your next party or gathering!  I hope you'll give this a try.  Thank you again for stopping by.  Stay tuned for more fun recipes and tutorials.