Showing posts with label Raspberries. Show all posts

Thursday, November 16, 2017

How to Make Vanilla Dream Mille Crêpe Cake (香草千層可麗餅蛋糕)


Holidays are fast approaching!  How do you celebrate?  I truly enjoy spending time with friends and family around the dinner table to create more memories. 


How to Make Vanilla Dream Mille Crêpe Cake  http://uTry.it

This gorgeous and scrumptious Vanilla Dream Mille Crêpe Cake would be the perfect sweet ending to your holiday meals!  It consists layers and layers of French Crêpes, alternate with a layer of Vanilla Mascarpone Cream Filling.  It’s decadent, yet not too sweet. 

How to Make Vanilla Dream Mille Crêpe Cake  http://uTry.it


The cake itself is truly delicious.  This recipe featured Singing Dog Vanilla’s Organic Vanilla Extract in both the Crêpe batter and the Raspberry Sauce.  I used Singing Dog Vanilla’s Vanilla Bean Paste in the Mascarpone Cream fillings in between the Crêpe layers.  This cake is packed with floral and sweet vanilla aromas and you can see the vanilla specks throughout the cream fillings.  The texture is silky soft and tender.  I like to drizzle a little bit of homemade raspberry sauce on top for a festive and refreshing taste.

How to Make Vanilla Dream Mille Crêpe Cake  http://uTry.it

If you’re still searching for a dessert to share with your loved ones, look no further!  I’m sure your friends and family will love this cake!

How to Make Vanilla Dream Mille Crêpe Cake  http://uTry.it


Click here for the recipe: https://goo.gl/ww9PYa


Tools and Ingredients Used:
Singing Dog Vanilla's Organic Vanilla Extract (Click here for more information)Singing Dog Vanilla's Vanilla Bean Paste (Click here for more information)
Crêpe Pan (Click here for more information)

Crêpe Spreader (Click here for more information)

Electric Crêpe Maker (with spreader) (Click here for more information)

Lazy Susan (Click here for more information)

Ninja Blender (Click here for more information)

Irish Salted Butter (Click here for more information)

Pastry Bag and Star Tip set (Click here for more information)

Offset Spatula (Click here for more information)

Heat Proof Egg Turner (Click here for more information)


Disclosure: uTry.it is a participant in the Amazon Services LLC Associates Program, an affiliate advertising program designed to provide a means for sites to earn advertising fees by advertising and linking to Amazon.com.

Disclaimer: This video is brought to you by Singing Dog Vanilla.  All messages and opinions are 100% my own. 


Friday, November 18, 2016

Lemon Raspberry Pastry Flower


Imagine, waking up to a plate of these gorgeous pastries on your holiday breakfast table?  It’ll definitely be a beautiful way to start your day on the right note!  To me, these are perfect afternoon treats and desserts, regardless of holiday or not. 

How to Make Lemon Raspberry Pastry Flower with Step-by-Step video tutorial.  Perfect for Holiday breakfast, or anytime treat!  http://uTry.it

This flower shaped pastry may seem complicated to prepare because they look so fancy!   However, the steps are really quite simple!  Check out my video tutorial above and you would agree with me too.  If you plan to serve these pastries on Thanksgiving or Christmas morning, you can even make them ahead of time!  Simply reheat them in the oven or toaster the next morning and you’re all set.  Oh, and you’re very welcome!

How to Make Lemon Raspberry Pastry Flower with Step-by-Step video tutorial.  Perfect for Holiday breakfast, or anytime treat!  http://uTry.it

To me, raspberries and lemon compliment each other really well.  So, I added some lemon juice and lemon zest in the cream cheese filling inside these pastries.  They are sweet and tart at the same time.  The citrus goes so well with the floral aroma of the raspberries!  The pastry is flaky, buttery, and oh so yummy!  The crust is super crunchy; yet the inside is smooth and creamy from the cream cheese filling.  Both flavor and texture contrast each other in the best possible way!

How to Make Lemon Raspberry Pastry Flower with Step-by-Step video tutorial.  Perfect for Holiday breakfast, or anytime treat!  http://uTry.it

I hope you’ll give this recipe a try soon!  Wish you all a blessed and wonderful Thanksgiving celebration next week!  Have a Fancy Pastry Friday!

How to Make Lemon Raspberry Pastry Flower with Step-by-Step video tutorial.  Perfect for Holiday breakfast, or anytime treat!  http://uTry.it


Ingredients and Tools Used:

Puff Pastry  (Click here for more information)
Silpat  (Click here for more information)
Cooling Racks  (Click here for more information)
Baking Sheets 
 (Click here for more information)
Cream Cheese 
 (Click here for more information)

Pizza Wheel 
 (Click here for more information)

Microplane 
 Zester (Click here for more information)

Organic Vanilla Extract 
 (Click here for more information)

Friday, May 27, 2016

Mixed Berries and Cream Tart 雜莓奶油撻 – For Memorial Day!


Are you ready for the upcoming long weekend?  Next Monday (May 30th) is Memorial Day.  It is a federal holiday in the United States for remembering the people who pass away while serving in the country's armed forces.  I salute to all those who served our country and keep us safe!  Thank you and your family for all your sacrifices!

How to Make Mixed Berries and Cream Tart 雜莓奶油撻  http://uTry.it

On a lighter note, the Memorial weekend is also the unofficial kick off of the summer grilling season!  I’ll share a few of my favorites grilling recipes at the end of this post.  If you’re hosting or attending a BBQ party this weekend, I highly recommend that you prepare this Mixed Berries and Cream Tart 雜莓奶油撻 to share with your friends and family!  What is a party without desserts, right? 

How to Make Mixed Berries and Cream Tart 雜莓奶油撻  http://uTry.it

This Mixed Berries and Cream Tart is one of my favorite summer dessert.  The tart shell is a combination of buttery and almond crust.  The slightly nutty flavor adds the charming characteristic to this flaky crust.  I filled the tart with the classic pastry cream and it’s quite simple to prepare.  Be sure to check out the YouTube video at the beginning of this post for the step-by-step tutorial.


How to Make Mixed Berries and Cream Tart 雜莓奶油撻  http://uTry.it

The stars of the show are really these gorgeous, sweet and juicy summer berries!  I used a combination of blueberries, raspberries, blackberries and strawberries.  You can use anything you like.  For a glorious sheen finish, I brush these berries with a simple orange marmalade glaze.  You can find the link to my homemade orange marmalade recipe at the end of this post as well.  This Mixed Berries and Cream Tart is perfect for any summer celebration!  Red, white, and blue for the patriotic colors and packed with the season’s best summer berries.  It truly is a feast for the eyes and for your tummy! I guarantee your friends and family will love this dessert! 

How to Make Mixed Berries and Cream Tart 雜莓奶油撻  http://uTry.it


Tools and Ingredients Used:

Corn Starch (Click here for more information)
Ninja Food Processor (Click here for more information)

Rectangular Tart Pan (Click here for more information)
Horizon Organic Heavy Whipping Cream (Click here for more information)
Organic Vanilla Extract (Click here for more information)
Kerrygold Butter (Click here for more information)
Silvered Blanched Almonds (Click here for more information)
Cooling Racks (Click here for more information)
Stand Mixer (Click here for more information)
Baking Sheets (click here for more information)


Other Grilling Recipes
Grilled Ribeye Steaks with Vanilla Coffee Rub


Hamburger with Caramelized Onions and Spicy Mayo
Grilled Vegetables Salad
Citrus Marinated Tri Tip Roast with Garlic Herb Dressing
Spinach Pesto Spaghetti with Grilled Shrimp

**Link to Homemade Orange Marmalade recipe:
http://utry.it/2012/05/orange-marmalade-with-meyer-lemon.html


How to Make Mixed Berries and Cream Tart 雜莓奶油撻  http://uTry.it


Friday, December 4, 2015

How to Make Raspberry Panna Cotta


I can’t quite believe it’s December already!  Time has past by a little too quickly this year, in my opinion.  Are you ready for the holidays?  If you’re looking for an entertaining, or a made-for-party, dessert recipe, you’ve stopped by at the right place at the perfect time.  Check out these gorgeous Raspberry Panna Cotta and I’m sure you’ll agree.  Click on the YouTube video above to watch the step-by-step video tutorial on how to make them.

Check out how to make Raspberry Panna Cotta with step-by-step video tutorial!  It's refreshing an very festive for the holiday.  Perfect recipe for entertaining.  http://uTry.it


The raspberry layer is slightly sweet and tart.  It’s super refreshing and packed with the floral fragrant of raspberries.  It pairs really well with the smooth and sweet vanilla bean panna cotta layer.  The red and white layers are so festive.  These gorgeous colors simply put me in the happy holiday mood. 

Check out how to make Raspberry Panna Cotta with step-by-step video tutorial!  It's refreshing an very festive for the holiday.  Perfect recipe for entertaining.  http://uTry.it


We’ve been tuning in to different radio stations when we’re on the road, and the Christmas songs always make me smile.  It’s probably one of the best time of the year for most people.  At the same time, I remember those who are less fortunate out there.  Just last week, I heard on the radio that a couple (whom preferred to remain anonymous) donated 500K to the Salvation Army!  It was probably one of the best news I’ve heard all year long!  That really touched me that there are still generous and kind people out there.  I know most of us don’t have that kind of money to donate, but there are many other things that we can do to help.  From pantry items to gently used clothes donated to your local non-profit organizations; or simply purchase a “Grab ‘N Give” bag at the grocery check out.  These are just some of the many ways that we can give-back to the community.

Check out how to make Raspberry Panna Cotta with step-by-step video tutorial!  It's refreshing an very festive for the holiday.  Perfect recipe for entertaining.  http://uTry.it

To me, it’s a privilege that I have the ability to help others, even in the smallest scale.  This holiday season, I want to encourage you to do the same.  It always makes me feel happy to know that a small gesture can bring big smiles on someone’s face.  

Check out how to make Raspberry Panna Cotta with step-by-step video tutorial!  It's refreshing an very festive for the holiday.  Perfect recipe for entertaining.  http://uTry.it


Last but not least, thank you for reading and stopping by my blog.  I hope you like today’s post and recipe.  I’ll be sharing more holiday recipes soon.  Stay tuned.

P.S.: Don't forget to enter the current Giveaways:

$100 Visa Gift Card Giveaway (Open to U.S. only, ending 12/31/2015)
Ultimate Paper Airplanes for Kids (Open Worldwide, ending 12/6/2015)


Check out how to make Raspberry Panna Cotta with step-by-step video tutorial!  It's refreshing an very festive for the holiday.  Perfect recipe for entertaining.  http://uTry.it


Tools and Ingredients used:

Libby Small Dessert Cups Set: (More information here)
Wilton Mini Muffin Pan: (More information here)
Pyrex 4 Cups Heat Proof Measuring Cup: (More information here)
Vanilla Bean Paste: (More information here)
Unflavored Gelatin Powder: (More information here)

Organic Cane Sugar (Click here for more information)

Wood Print Photography Backdrop (Click here to see similar product)


Wednesday, June 24, 2015

Chia Seeds Pudding Parfait


Check out how to make this refreshing and healthy Chia Seeds Pudding Parfait   http://uTry.it


Summer is approaching fast!  Are you ready for the swimsuit season?  Honestly, I am not too looking forward to that heat, let alone showing my floppy arms and chubby thighs.  Quite frankly, I love food too much to get on a "diet", any diet!  I am not the girl who can starve herself to lose a few pounds, sorry!  Sorry is for those people around me who have to endure seeing my chubby legs and floppy arms!


Check out how to make this refreshing and healthy Chia Seeds Pudding Parfait   http://uTry.it


On the other hand, I try to eat lighter or healthier whenever I could, especially when I am desperate to get my body somewhat ready for the summer clothes.  Key word here is "try"!  My solution?  I created this Chia Seeds Pudding Parfait for breakfast!  It's packed with yummy goodness, vitamins, protein, and fiber that I need.  It's so filling that you'll feel full and satisfy without the guilt!  Best of all, it looks as good as dessert, and I can definitely eat this as dessert too! 

Check out how to make this refreshing and healthy Chia Seeds Pudding Parfait   http://uTry.it


It's super easy to prepare as well.  All you need is soaking the chia seeds ahead of time.  You can even do that the night before to save time.  I used almond milk in my recipe.  But you can use anything you like, soy milk, regular milk, etc.  I love the flavor of almond milk and that's what I have on hand, making this a vegan friendly recipe, too.

Check out how to make this refreshing and healthy Chia Seeds Pudding Parfait   http://uTry.it


Check out the video tutorial below to see how I made it.


I hope you enjoyed watching my video tutorial.  If you haven’t done so, please subscribe to my Youtube channel here.  You’ll be the first to know when I have new video tutorials published.


Check out how to make this refreshing and healthy Chia Seeds Pudding Parfait   http://uTry.it


This is my latest favorite breakfast item.  What is yours?  I can always use more tips and ideas.  Can't wait to hear from you.


Tools and Ingredients Used:

Chia Seeds (click here for more information)
Organic Almond Milk (Click here for more information)
Tall Parfait Glasses (Click here for more information)


Saturday, May 4, 2013

Boozy Framboise Guimauve Pops--For Mothers Day


351edited

The other day, I was craving for marshmallows.  Those soft, pillow-y and flavorful marshmallows.  Ever since I made my own, (see previous posts from here and here), I can never go back to the store bought ones.  If you've ever tried a homemade marshmallow, you will know exactly why.  The texture of the homemade ones is just heavenly soft and light; the flavor is truly up to your imagination.  On the day I craved for the marshmallows, my imagination took me to a boozy place, with sweet and tart framboise (raspberry in French), and a wonderland filled with pinkish guimauve (marshmallow in French).  Okay, I know, I’m not French, but don’t you agree that French names sound more fancy and romantic? And these Boozy Framboise Guimauve Pops definitely are fancy, romantic and just darn tasty!  They will make you dream a little.

389edited

Making homemade marshmallow involve making a syrup, which is a solution of sugar and liquid, and cook it to a certain temperature.  The easiest way to tell the temperature of the syrup is using a candy thermometer.  If you don’t have one, I highly recommend you getting one.  It’s not only useful in candies making, but also handy when canning for jams and cooking the custard for your favorite ice creamClick here to see the thermometer I use.  The price is reasonable and and the numbers are easy to read.

500edited-1

I couldn't help it but to turn these marshmallows into pops, lovely flower pops.  You can wrap them individually with treat bags and pass them on as gifts (you know, Mother’s Day is coming up).  I think they are the perfect homemade gifts for Mother's day.  They are just so feminine and beautiful. Although you can hardly detect the taste of liquor in these mallows because most of the liquor is cooked off.  These boozy mallows are simply not for kids, pregnant ladies, or any one who can’t take alcohol.  But, you can certainly replace the liquor with fruit juice and make them kids friendly.  My kids love the kids friendly version a lot.  I’ll include both recipes below for your convenience.  Oh, and I used these cookie cutters to make the pops.  Aren't they the cutest thing ever!?

334edited

So, I made a batch of kid's friendly flower pops for my kids.  Then a boozy batch for myself and some friends to enjoy!  To distinguish the two, I piped the boozy one into long ropes in a pastry bag fitted with a round pastry tip.  When the ropes were dry, I cut them into small pieces.  These are not just cute, but also sweet, tart, raspberr-ey, pillow-y, and melt in the mouth as well.  Super addictive!  One last thing, I used potato starch to prevent the marshmallow from sticking together.  You can also use a mixture of corn starch and powdered sugar.  However, I love the potato starch because it's mild and doesn't have the raw flour taste.  Plus, the potato starch doesn't add any sweetness to these mallows as they are already sweet enough.  I used the potato starch to coat these Black Sesame Mochi as well.  Have you ever make homemade marshmallows before?  I want to know what flavors you dream of. 

405edited


For more homemade gift ideas for Mother's Day, check out the Meyer Lemon Sugar Scrub and Lavender Bath Salt.


Friday, December 21, 2012

Frozen Raspberry Sparkle


071edited

This Frozen Raspberry Sparkle is the official Holiday cocktail in my house.  You’ve guessed it right!  Yes, I am the one who made it official.  Why not?  I’m sure we all can use a cocktail in between all these crazy holiday shopping and baking chaos.  Besides, it’s a festive and beautiful drink that you can serve during the holiday gatherings.  Best of all, it’s super easy to prepare.

023edited

I love the frosted look of these frozen raspberries.  They are just so pretty to look at.  I freeze up some extras and they made a wonderful snack on their own.  Plus a few of them in your drink will keep your cocktail nice and chilled without diluting your drink with the ice.  Pretty cool, huh? 

Mix


I can’t believe Christmas will be here in less than a week!  So, how far are you with the holiday shopping and preparation?  Are you all prepared, almost done, half way through, or haven’t even started yet?  I think I belong to the 'almost done' group, I guess.  I would love to hear from you.

097edited


Please drink responsibly.  Health and General Disclaimers.


Friday, July 6, 2012

Peach And Raspberry Frangipane Tart—With Pictorial

 
412edited-1

Frangipane is a filling made from, or flavored with, almonds. This filling can be used in a variety of ways including cakes, tarts and other assorted pastries.  Today, I made this filling for my tart.  To be more specific, a Peach and Raspberry Frangipane Tart.

388edited

As we’re entering the summer, also known as the stone fruit season, I don’t think there’s any kind of stone fruit that I don’t like. Juicy plum, fragrant peaches, firm yet tender nectarines, sweet prunes, and floral apricots etc. They are all so wonderful. I’m a happy girl sniffing away the fruits to select the perfectly ripped ones to enter my basket. Today, my recipe features the sweet and juicy peaches.
420edited

This Peach And Raspberry Frangipane Tart might have a few more steps than most of my recipes. But I have a detailed pictorial that will guide you through each step. Keep in mind... although there are more steps involved, they are actually quite simple.  Also, this recipe involved making a tart crust.  I know some of you might feel uneasy about rolling and baking your own crust.  But trust me, it’s totally worth it.  I have a few great tips for you in preparing the perfect crust. So, are you ready to come into the kitchen with me?  Let’s go…

1) Process the crust ingredients in a food processor and refrigerate until ready to use.  Then, roll out the dough between two plastic wraps.  Here’s the neat trick, after placing the dough between the plastic wraps, fold the sides/edges into the size you desired.  I used a 13 3/4" x 4 1/4" x 1" high rectangular tart pan with a removable bottom, so I need my dough to be a 16” X 6” rectangle in order to have the height/sides of the pan covered as well. 

2)  See the “sharp” corner you get from this trick?  Of course, you don’t need a sharp corner dough as it’ll probably get trimmed off later anyway.  But this technique will give you the exact size of dough you want and super easy to roll without any dough sticking onto your rolling pin.

3) Another benefit of using the plastic wrap is easy transfer.  See how neat the dough is?  Simply remove the top plastic wrap, flip the dough over onto the tart pan and peel the other plastic wrap off the surface.  But even if your dough crack a little, no big deal, just use the excess dough to mend it back.  No one will see it and it will taste just as wonderful.

4) Roll the rolling pin over the tart pan to cut off the excess dough.  See how clean it is?  You’ll get perfectly trimmed crust every time….the super easy way too.

Pictorial A

5) Prick the dough with a fork.  Place in the freezer until the crust is firm.

6) Cover the edges with foil (to prevent the crust from getting too brown)

7) Place a piece of parchment paper on top, then add the dry beans or pie weight (this prevent the dough on the bottom from puffing up) and bake for 20 minutes.  Then, remove the parchment paper and dry bean and continue to bake for another 20 to 25 minutes.  This would get the bottom of your crust golden brown.  Remember the foil on the sides (in picture 6)? Leave them there as they prevent the edges from getting too dark.  Aren’t you glad that you covered them while the tart pan was cool so you don’t have to do it now?  You are very welcome.

8) This is the almond paste I use for the fillings. 

Pictorial B

9) Here’s how to make the filling.  In the bowl of a stand mixer with the beater attachment, beat the almond paste, sugar and salt on medium speed

10) Beat until mixture forms small crumbs.

11) Beat in butter until fluffy

12) Add the egg and beat until ingredients are well incorporated

Pictorial C

13) Add the vanilla extract until well combined.

14) Turn mixer to low, add cake flour and beat until mixture just combined.

15) Spread the frangipane onto the cooled tar shell.

16) Top with peaches and raspberries. (do not press them down.  As the filling bake, it will pop up and cover the peaches and raspberries a little more.) Bake for another 20 to 25 minutes or until the tart is golden brown. Transfer to a wiring rack and let the tart cool completely.

Pictorial D

See how much the fillings popped up?  I also love how golden brown it is.  Last but not least, gently brush on the orange marmalade glaze to give it some sheen and a hint of citrus flavor to brighten up the tart.

Before and After-2

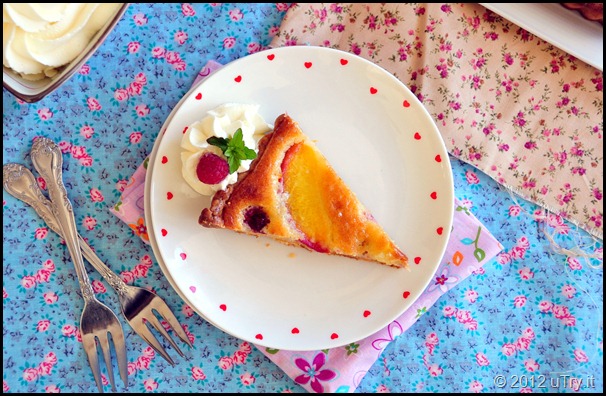
This tart is simply divine.  The crust is buttery and flaky with just a hint of sweetness.  The Frangipane filling is light, smooth, fluffy and tender.  It feels like you’re eating a very moist almond cake.  The peach is tender yet still have a bite to it.  The slightly tart raspberry is the perfect balance.  Isn’t it a gorgeous tart to serve in any occasion?  Serve it with a dollop of fresh whipped cream, more fresh raspberries on the side and you’re all set.  I hope you find today’s recipe, pictorial and tips helpful to you.  Happy baking!

434edited


Friday, May 18, 2012

Triple Berry Mini Pavlova

 
010edited

I love the berry seasons!  I mean, who doesn’t?  Well, probably my hubby is the only one around here who doesn’t really care about berries.  But then I couldn’t help it but to grab a few basketful of berries home when the vibrant and juicy berries are weaving at me at the farm stands.

118edite--a

If you are not familiar with Pavlova, it’s a meringue based dessert, filled with a whipped cream filling and top with some fruit or fruit sauce. Pavloca is named after the Russian ballet dancer Anna Pavloca. This dessert was created in honor of the dancer during her tours to Australia and New Zealand back in the 1920s.  So, thank you Anna and whoever created this dessert.

028edited

How good are these?  Well, my tiny little girl ate two of these in one sitting (a batch I made without the liquor).  Alright, these Triple Berry Pavlova are not that big (I made them in 3-inch diameter).  But still, I didn’t expect my little girl to finish two of these all by herself!  Plate licked clean!  Okay, that’s a bit exaggerated.  But she really did finished the very last crumb on her plate.  Smile

185edited

In this Triple Berry Pavlova, I used strawberries, blueberries and raspberries. The ripe and juicy berries are beautiful and the hint of tartness is perfect. Let me tell you, you need to make this Triple Berry Pavlova real SOON. More like, go grab your berries now and run to the kitchen and make this Triple Berry Pavloca, kind of SOON!  You’ll be glad you did.  Winking smile And yes, you’re very welcome!

035.editedJPG

When I was piping the meringue shells, I got a tiny little bit of batter left, but wasn’t quite enough for another shell.  So, I piped dollops of meringue drops and use them as garnish on top of the pavlova, as shown in the picture above.  Nothing goes to waste in this house.  Winking smile

Piping Instruction

Piping the meringue shells is super simple (refer to the picture above).  I used a piping bag with a Wilton 1M star tip.  See the purple line in the above picture?  Simply start piping from the middle moving outward to make a 3-inch round.  Pipe an additional round of meringue on the edges to create the “shell” so you can put fillings into the shell after it’s baked. 
 
Berry Sauce Trio

For the meringue shells, I added freeze dried blueberries to add more flavor.  I didn’t use any food coloring so the color of these shells are not as purple as I want them to be.  These are all natural colors from the blueberries.  If you’re serving the pavlova for parties and want them to look their best, feel free to add a few drops of food coloring. 
 
152edited-1

While the meringue shells are baking, you can go ahead and prepare the orange cream and berry sauce. Both of them are decadent on it’s own. Imagine what they can do when put together in a mouthful…along with the meringue shells! It was totally a flavor and texture explosion in my mouth.  This time, I’m NOT exaggerating!  Winking smile 
 
219edited

Make sure you get a little bit of everything in each bite.  You’ll taste the sweet and tart berry sauce on top, and a few juicy berries bursting in your mouth, along with fragrant and creamy orange cream, then the crunch from the light, airy and crispy meringue shell.  Tell me that’s not a flavor and texture explosion in my mouth, I don’t know what is.  It was totally a party for my taste buds.
  Descriptions

Are you convinced to run to the kitchen to make these Triple Berry Mini Pavlovas yet?  Don’t wait any longer.  I think I’m going to make some more….now! 
  162edited